Carburettor overhaul
Carburettors are only fitted to motorcycles that have been around for a few years, so the topic of carburettor maintenance is all the more important if you own an older machine.
- Carburettor as cause of failure
- Carburettor overhaul – now let's get started
- 01 – Access carburettors
- 02 – Remove carburettors
- 03 – Check intake rubbers
- 04 – Clean outside of carburettors
- 05 – Unscrew float chamber
- 06 – Pull out axle and remove float
- 07 – Take off carburettor cover and slide valve
- 08 – Unscrew jets
- 09 – Blow out bores with compressed air
- 10 – Do not forget these bores
- 11 – Fit new gaskets
- 12 – Hook in float needle
- 13 – Re-grease all rotating parts
- 14 – Synchronise carburettors
- Our recommendation
Carburettor as cause of failure
If your carburettors aren't doing their job, it's time for an overhaul. If the ignition system is working perfectly but the engine still isn't running smoothly, performance is down and starting is poor, the problem may lie with the carburettors. Also, if your carburettors constantly overflow or don't work properly despite the correct fuel supply, these are clear signs that the float needle valves are faulty or there's dirt in the carburettors. Such problems arise most often if you didn't drain the petrol from the float chambers before tucking up your machine for the winter.
It's amazing the effect a good internal clean, a couple of rubber rings and a new float needle valve can have. After that, synchronisation is not essential as long as the carburettors were not separated, but better safe than sorry. However, there's no point synchronising the carbs unless the valves are exactly adjusted and compression, spark plugs, ignition cables, etc. and the ignition timing are perfect.
If you'd like to give your bike a bit of a tune-up, now is a good time to install a Dynojet jet kit. It can often help to close any gaps in the acceleration curve of a stock engine. The trade press has confirmed that this gives improved running characteristics and smooth acceleration. But equally, if you have to adjust your carburettors because of an open exhaust system, a modified air filter or similar tuning measures, you'll find a Dynojet jet kit makes the job considerably easier. The kits are specially developed on the dynamometer for each individual bike model, and they include everything you need for mixture enrichment. Different tuning kits are available, each put together for stock engines or for bored out engines with performance camshafts, etc. Even on a production bike with the original air filter, you will often get a noticeable boost in power and performance. However, the final fine-tuning on your motorbike can be somewhat time-consuming, as each kit contains jets of different sizes to choose from.
Carburettor overhaul – now let's get started
Step 1: Access carburettors
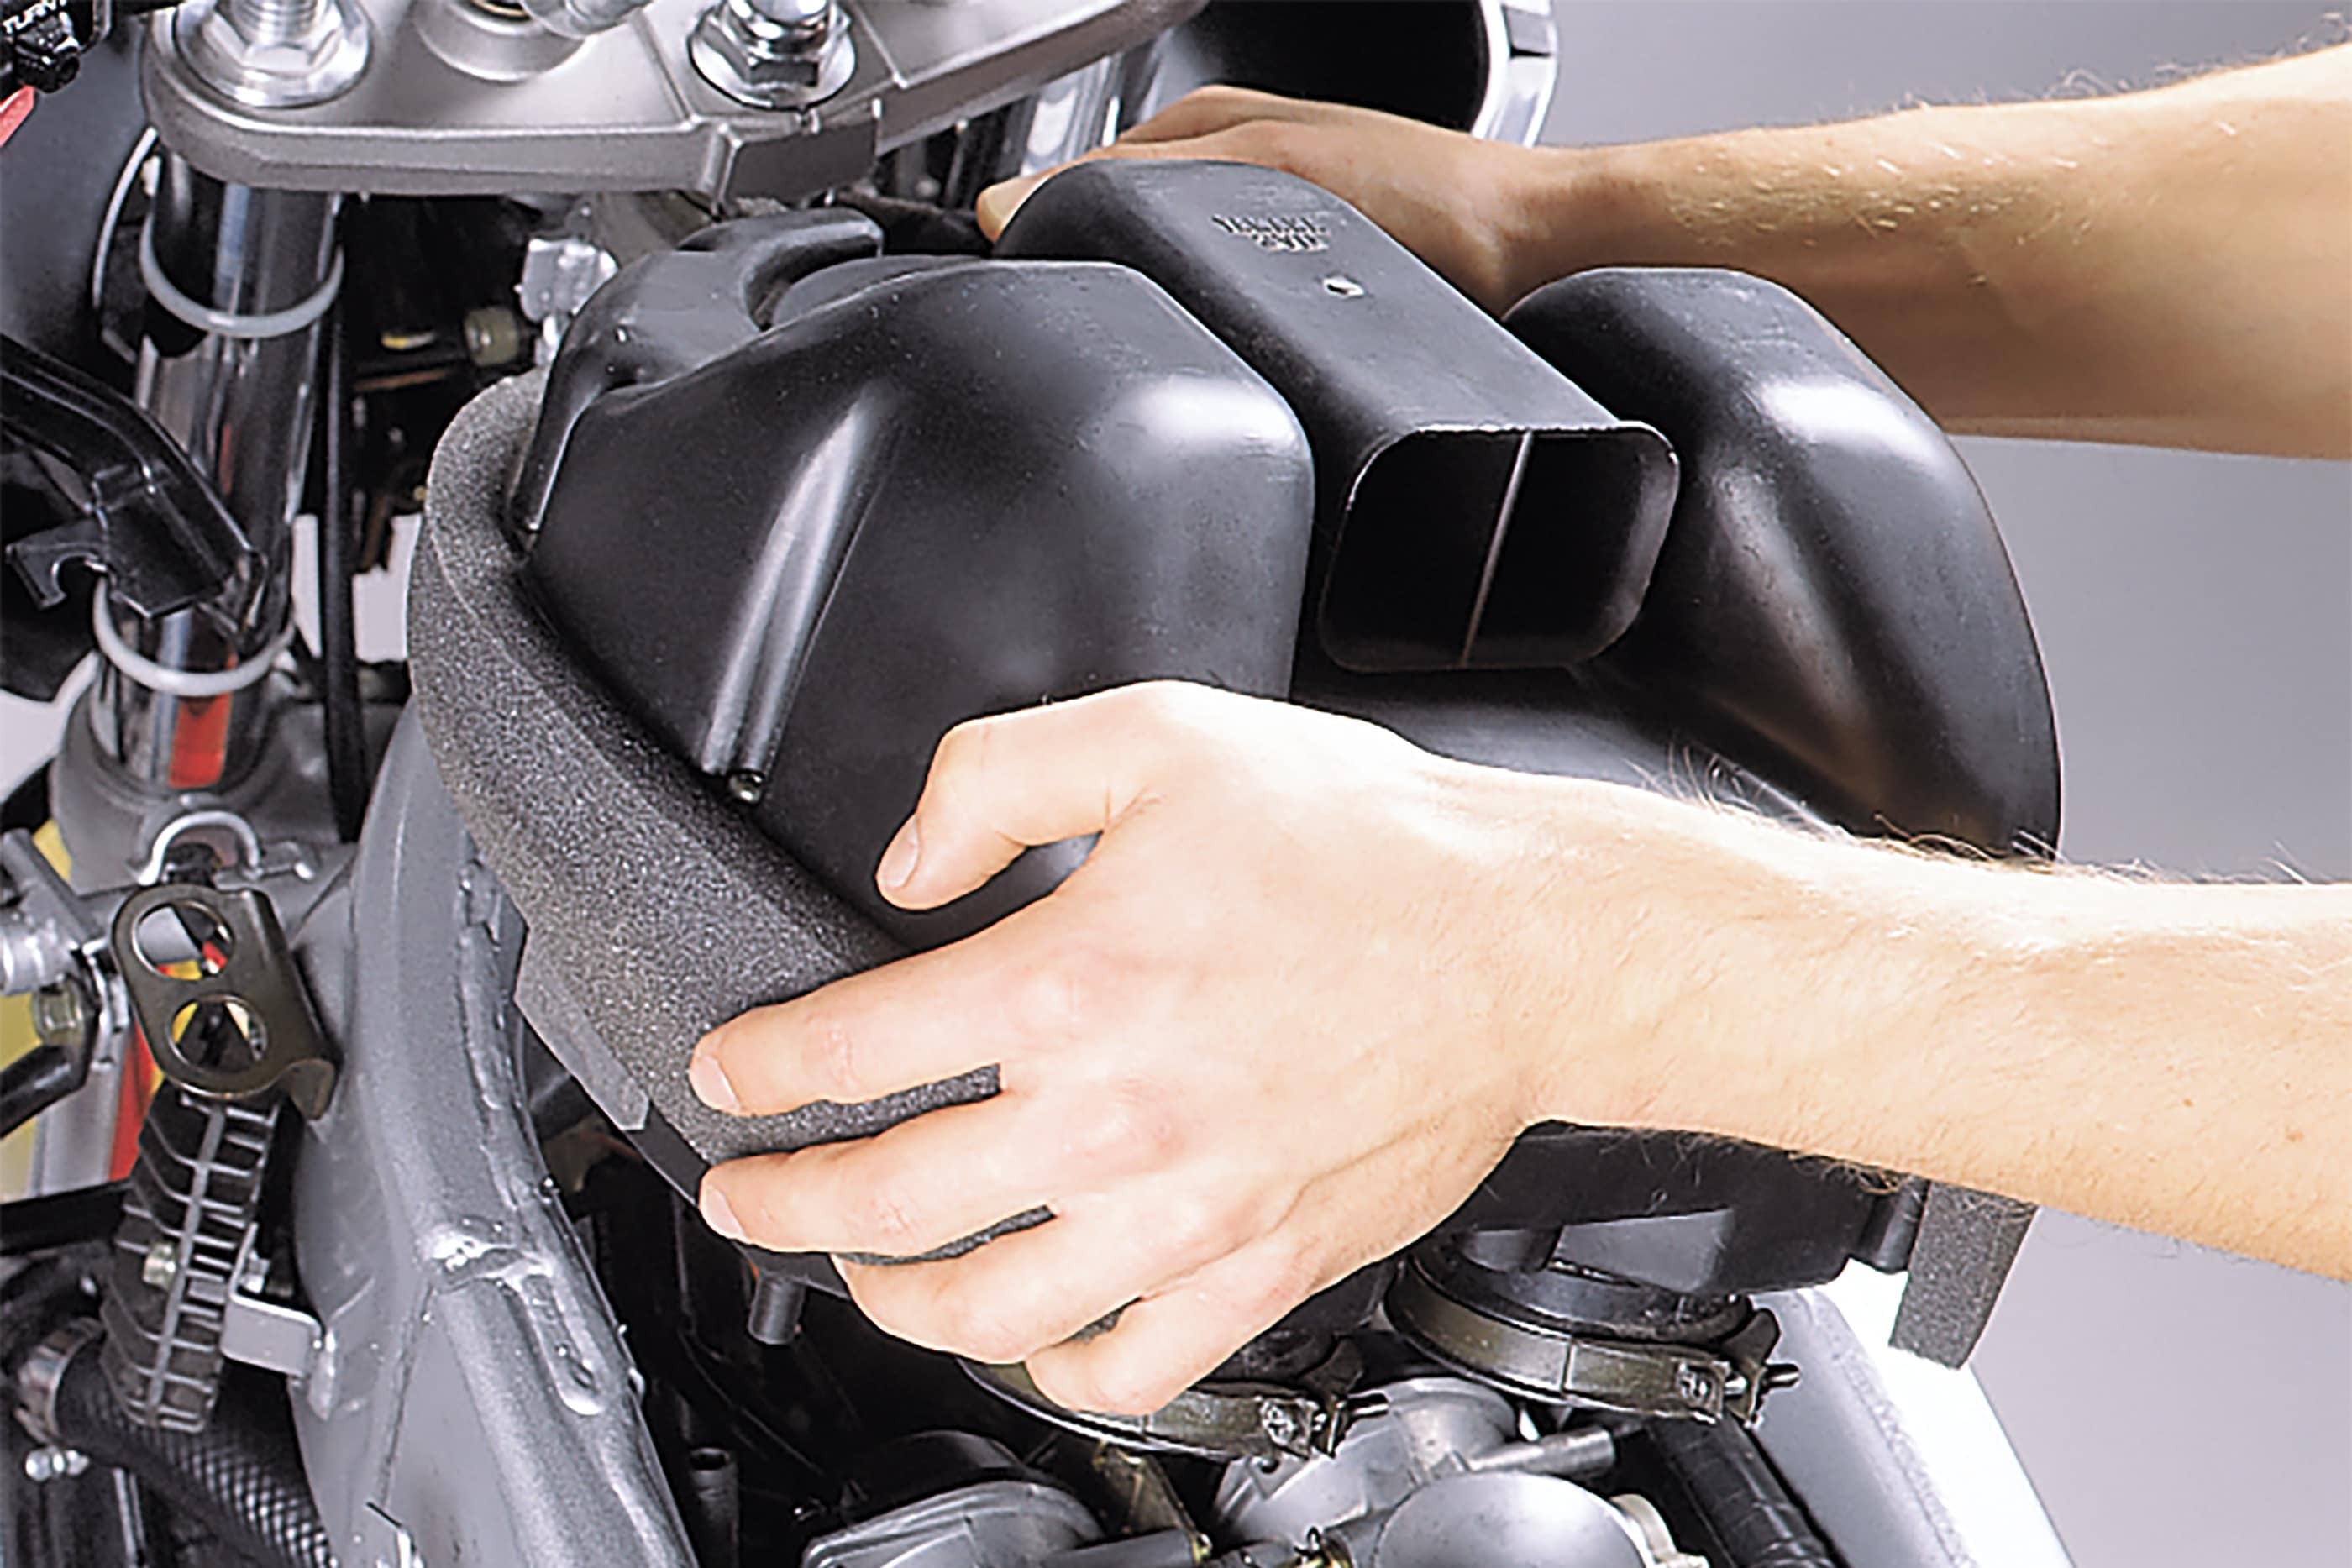
01 – Access carburettors
Depending on the type of engine, you first have to access the carburettor bank. Seat, tank and side cover almost always have to be taken off to get to the airbox, because it has to be taken out or at least pulled back. Once you manage to remove the bulky box, it takes no time to remove the carburettors themselves. It's important to note the location and connections of the vacuum hoses so that you're sure to put everything back in its place afterwards. If in doubt, it's advisable to mark the hoses and their connections to avoid a mix-up. Or you could take a photo with your smartphone. Next, remove the throttle cables and the choke cable. To ensure that the petrol doesn't leak out when the carburettors are removed, we recommend draining the carburettors at the drain plugs (after the engine has cooled down) before removing them from the bike. When doing this, it's essential to ensure plenty of ventilation and never use a naked flame (risk of explosion!).
Step 2: Remove carburettors
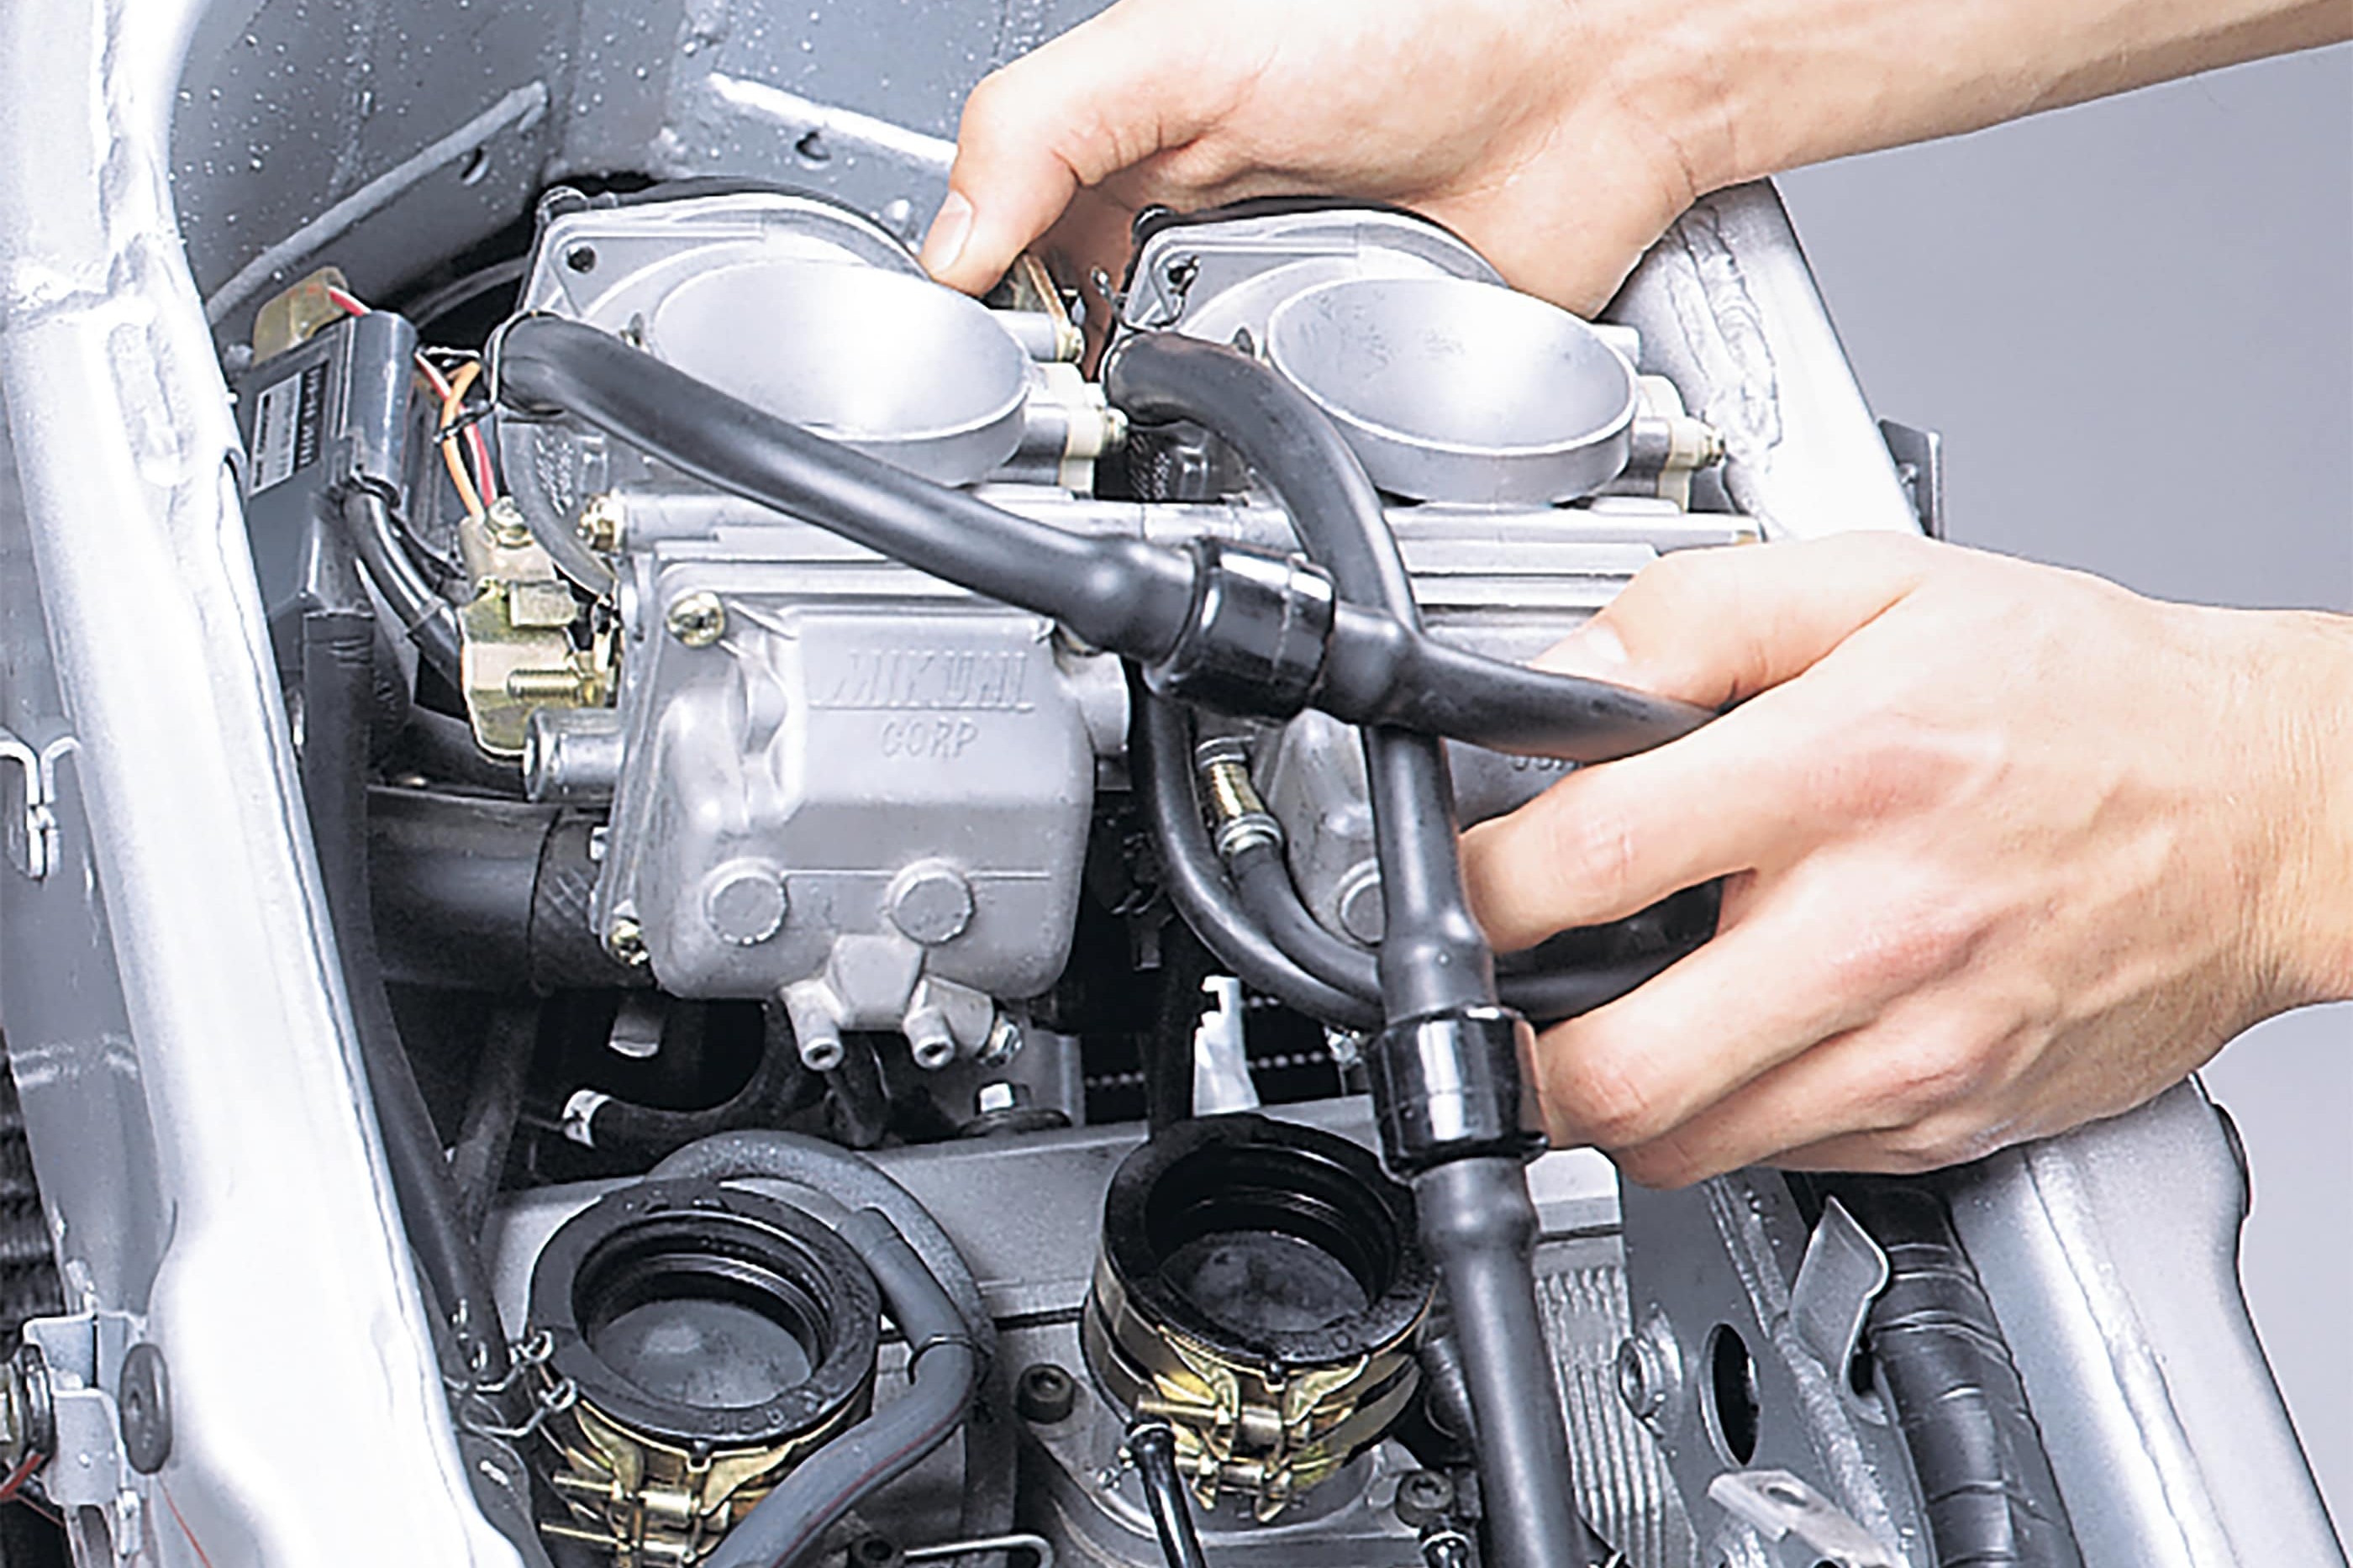
02 – Remove carburettors
Once the carburettors are only secured in the intakes, undo the clamps and remove the carburettor bank.
Step 3: Check intake rubbers
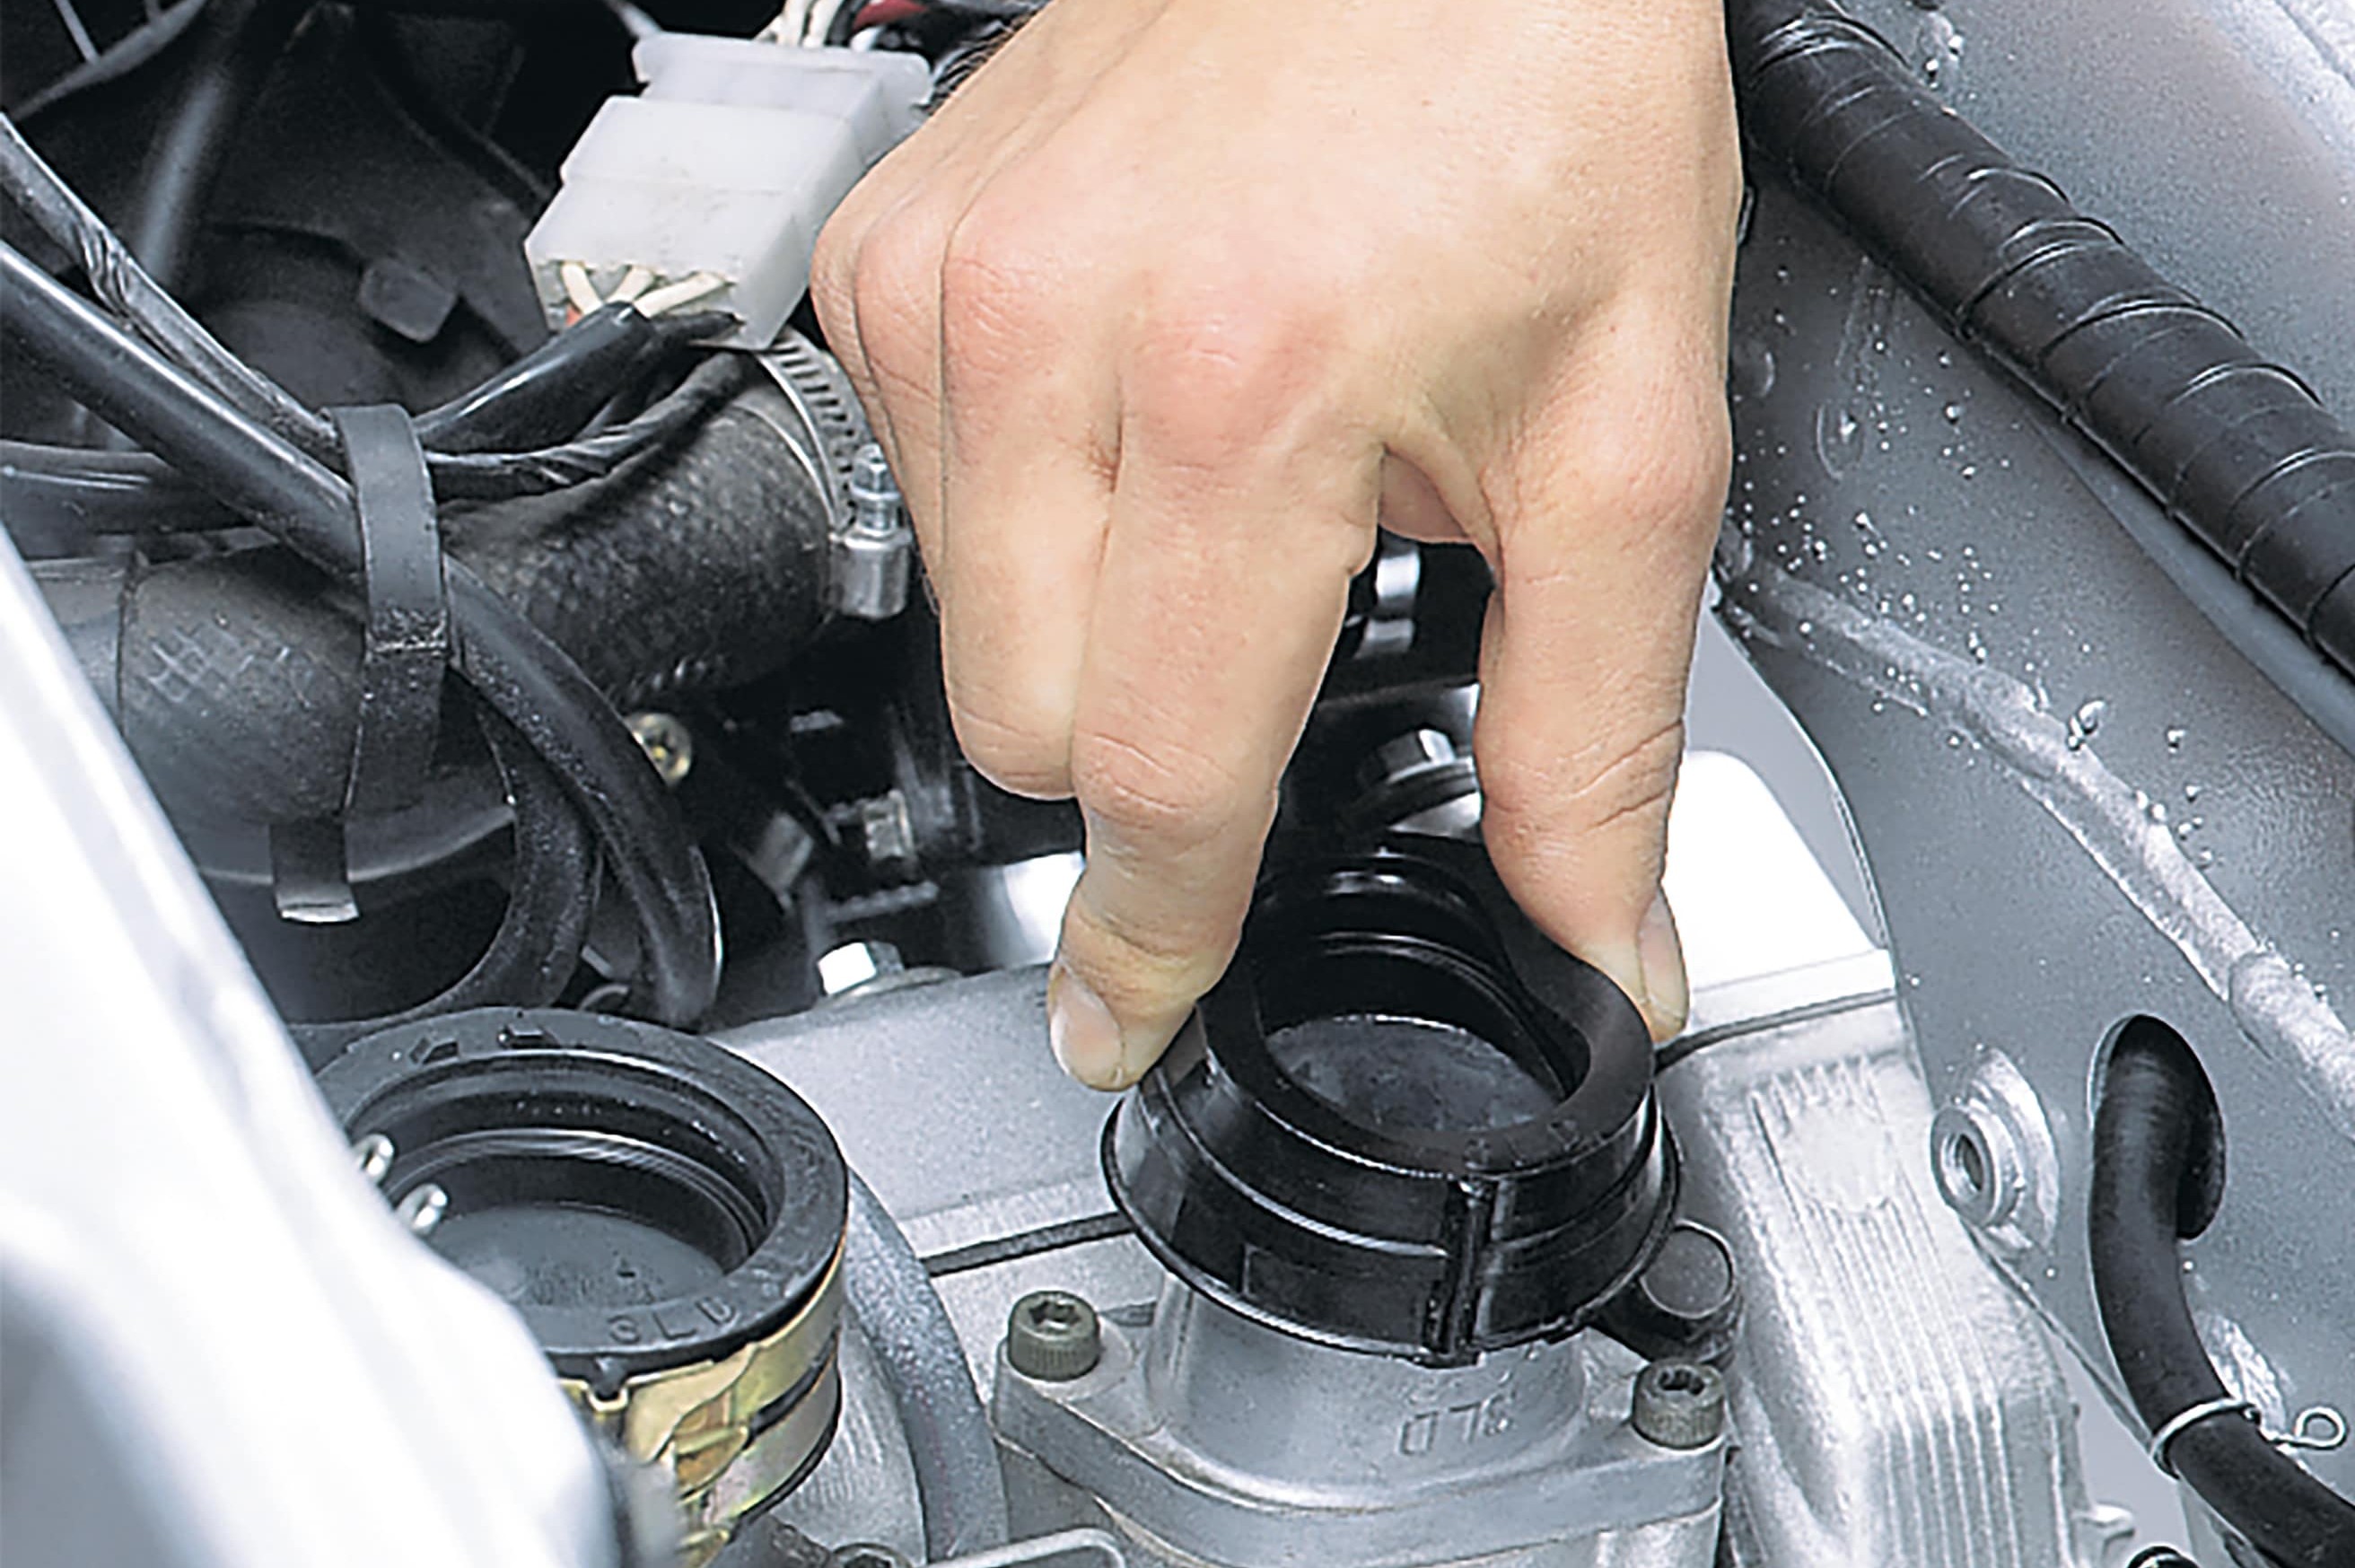
03 – Check intake rubbers
Inspect the intake rubbers straight away. If they are porous, cracked or rock-hard, they must be replaced, as they are the primary cause of carburettor failures due to unwanted air leaking in. Considerably cheaper intake rubbers than the originals are available from component and accessory suppliers, and also for various scooters.
Step 4: Clean outside of carburettors
04 – Clean outside of carburettors
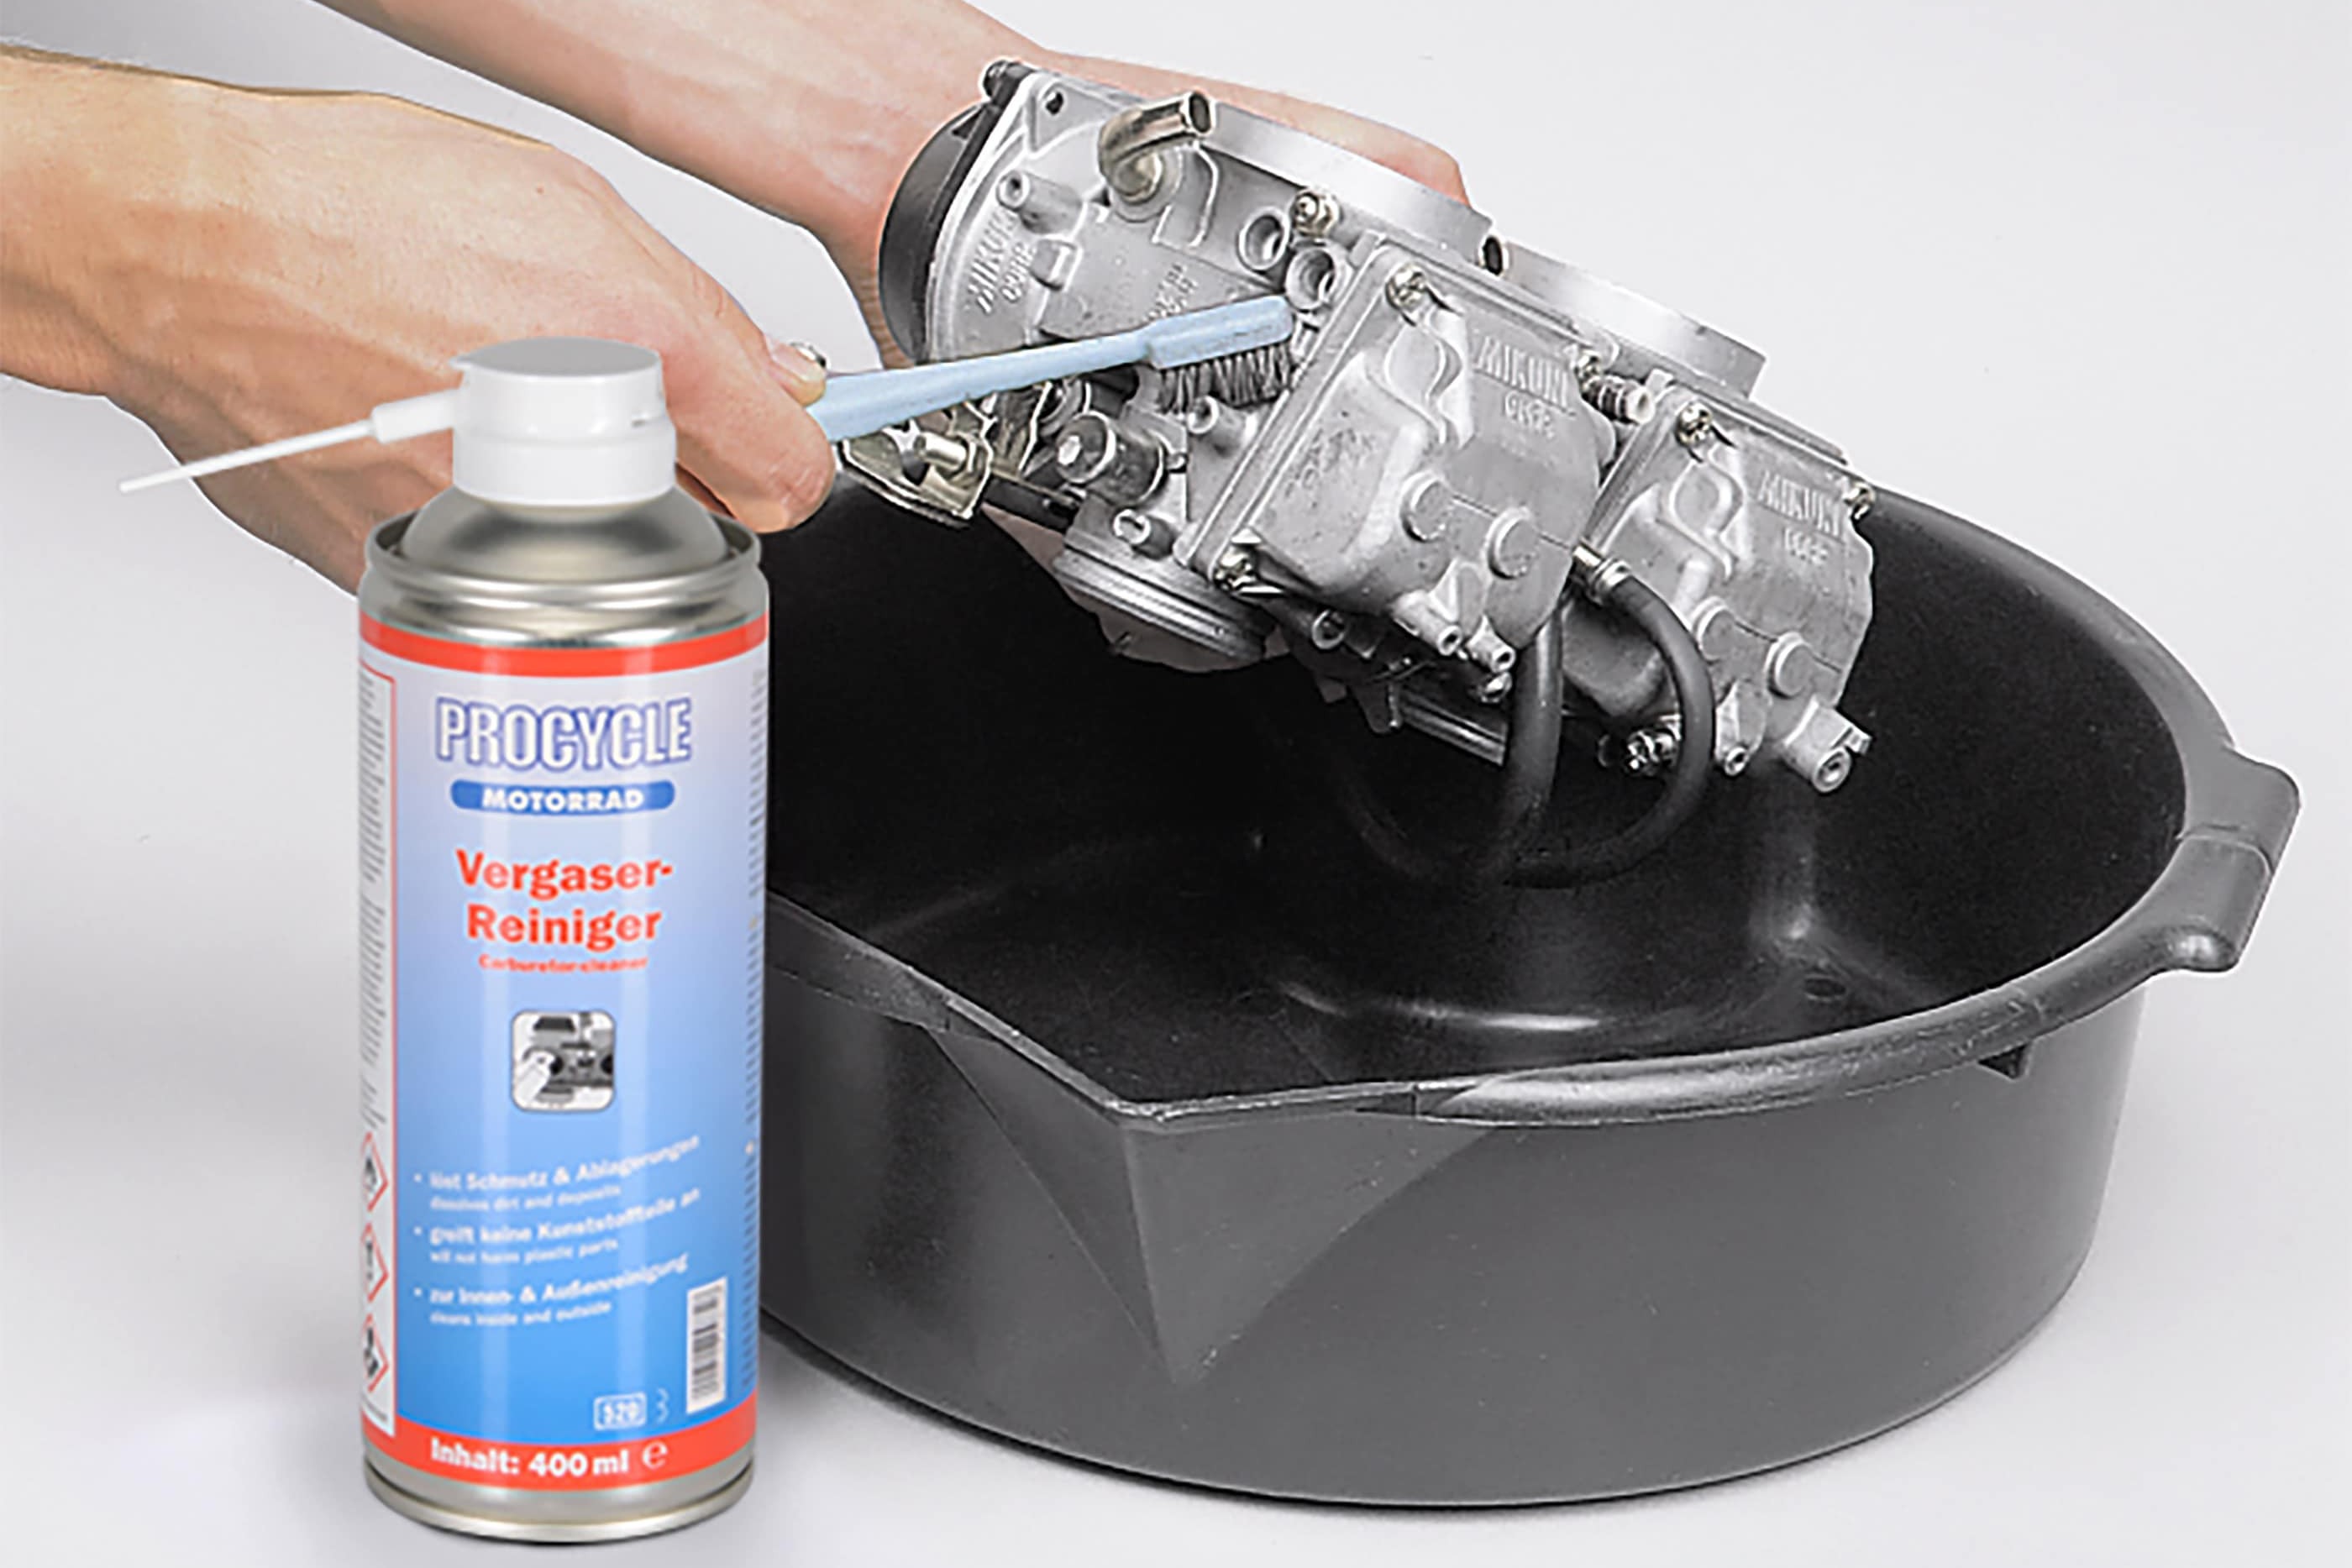
Before opening up the carburettors, first clean the outside so that no dirt gets in. The dirt is easy to remove with PROCYCLE carburettor cleaning spray, and a brush is handy for this job.
Step 5: Unscrew float chamber
05 – Unscrew float chamber
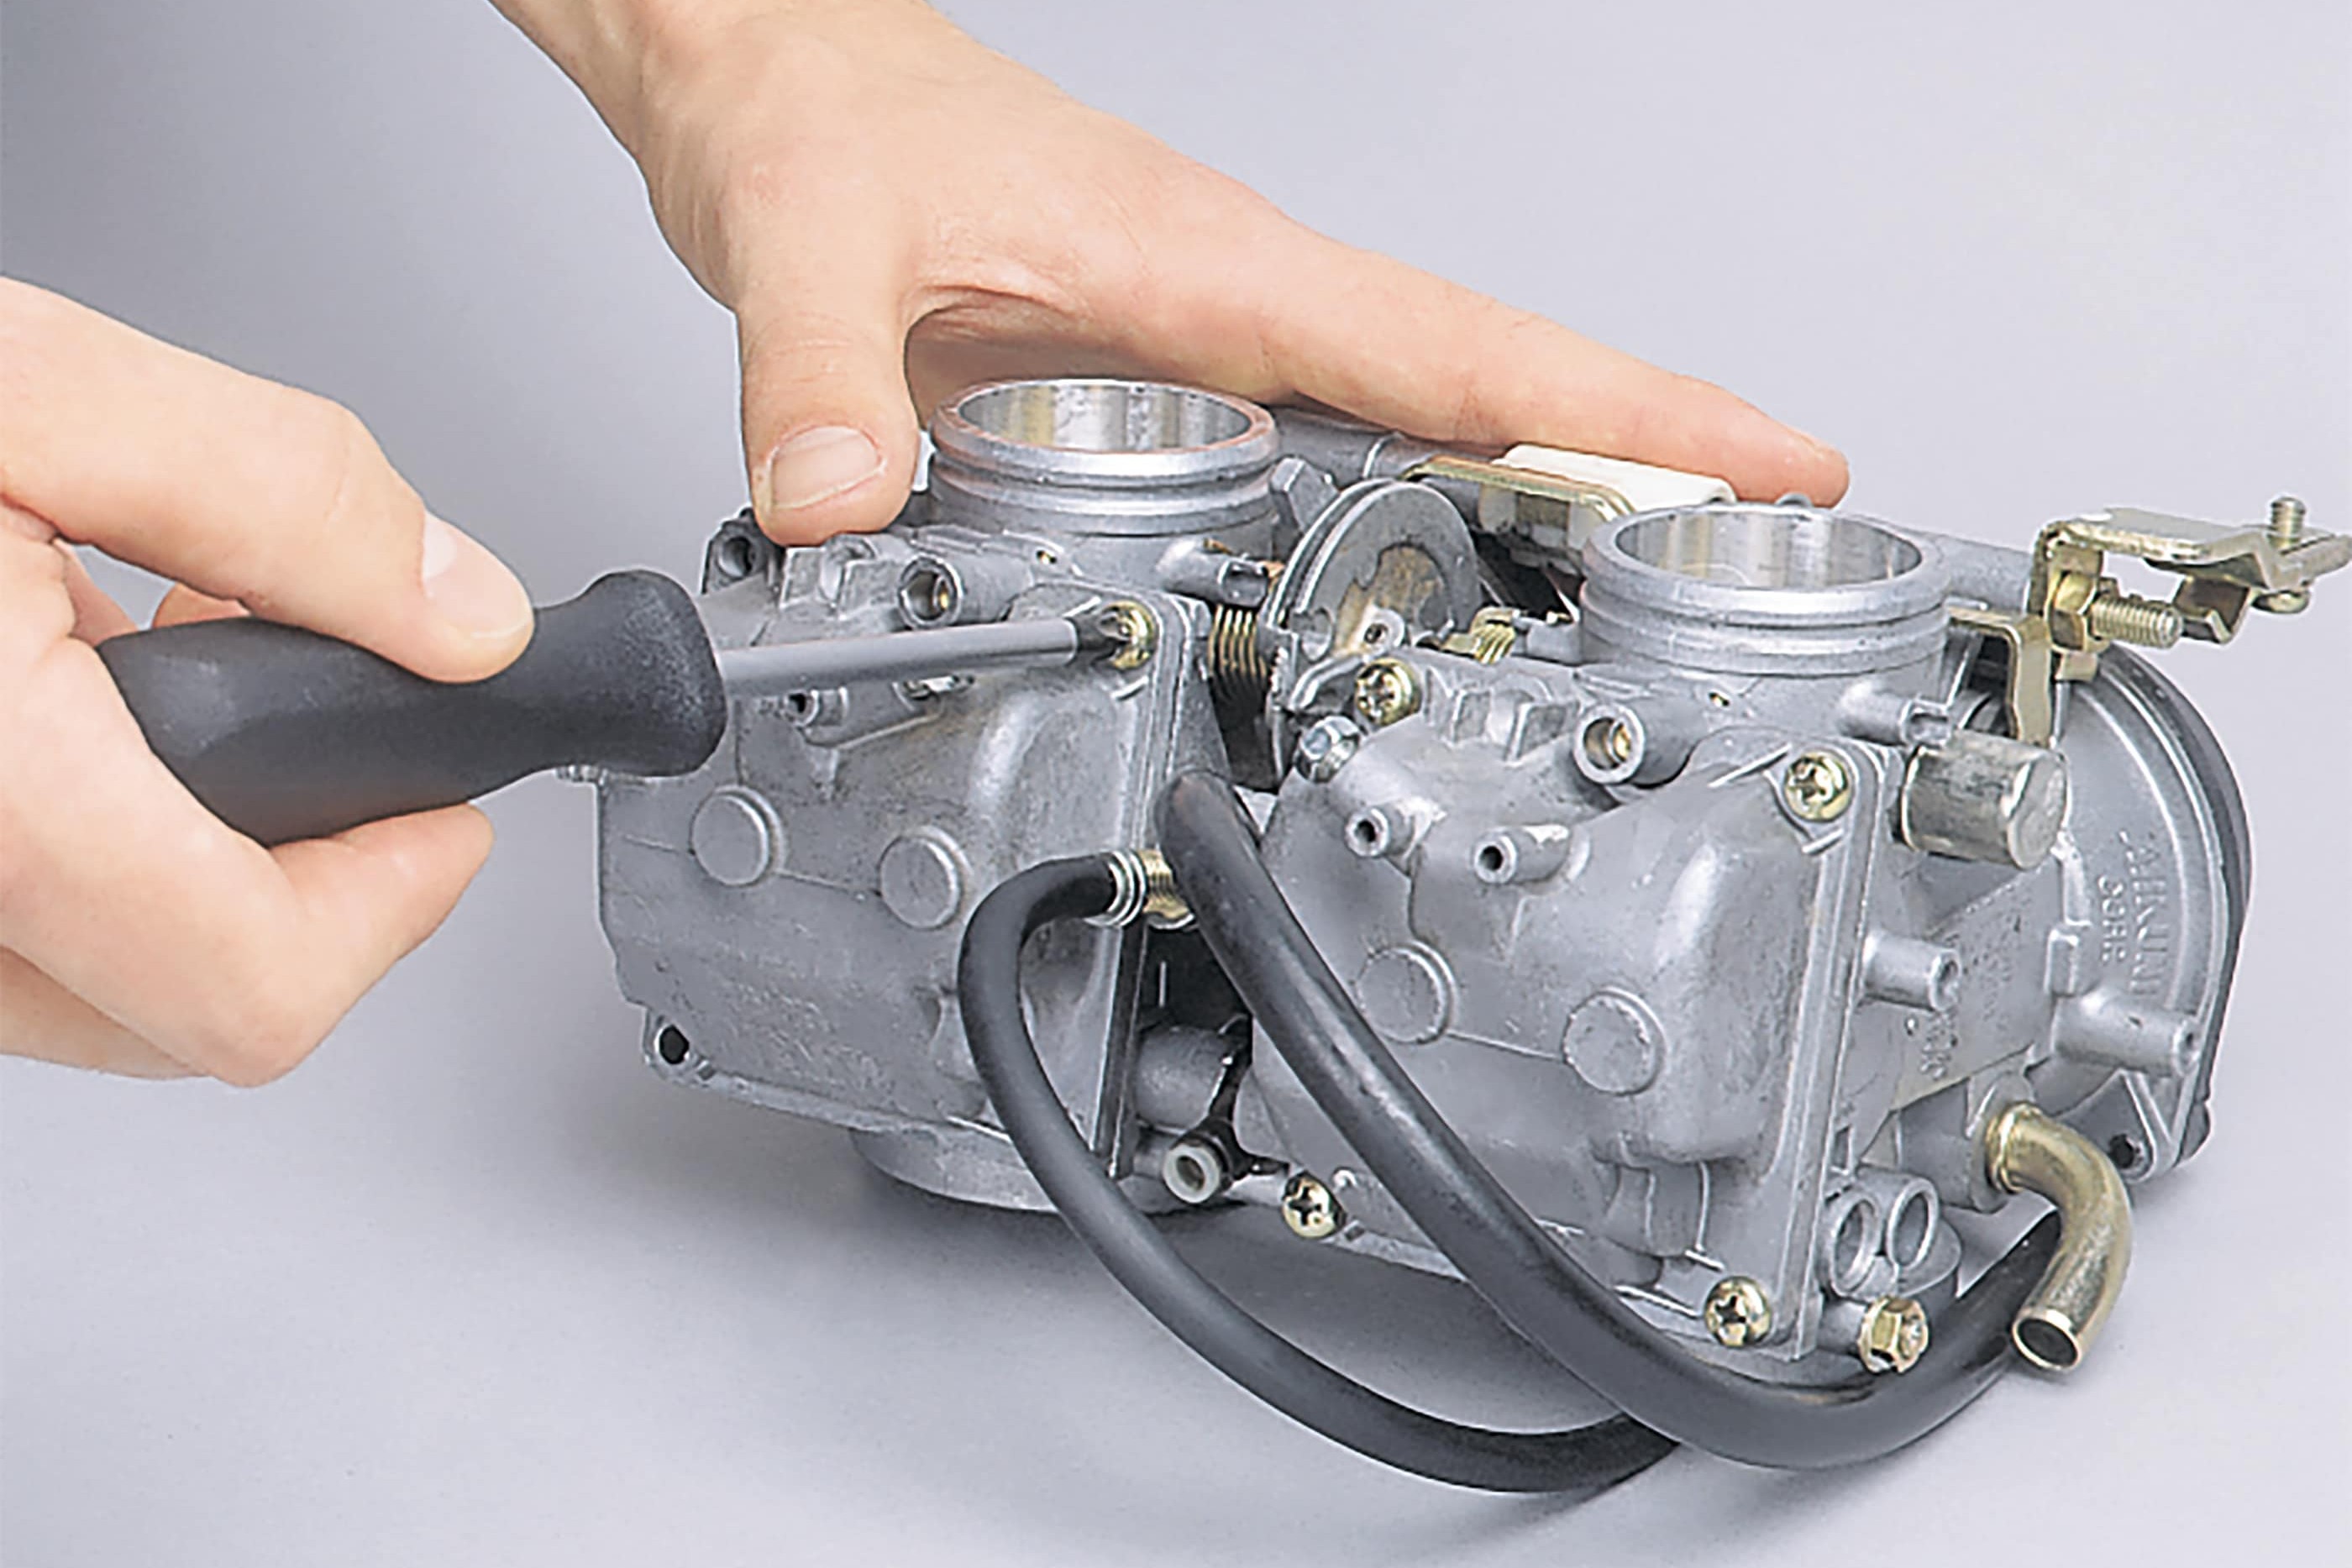
Once the outside of the carburettors is clean, you can start dismantling the float chambers. This is not something you should be doing on the floor of the garage. Spread out a large, clean cloth for placing the removed parts on. The most commonly used small cross-head screws made of Japanese soft iron must only be removed with precisely the right size of screwdriver (Japan Industry Standard), or else you will damage the heads (soft screws are used because carburettor housings are not exactly very hard either).
Applying a penetrating oil beforehand can be very helpful. We recommend repairing the carburettors one at a time so nothing gets mixed up. Ensure scrupulous cleanliness, as the smallest particle could block a jet.
Step 6: Pull out axle and remove float
06 – Pull out axle and remove float
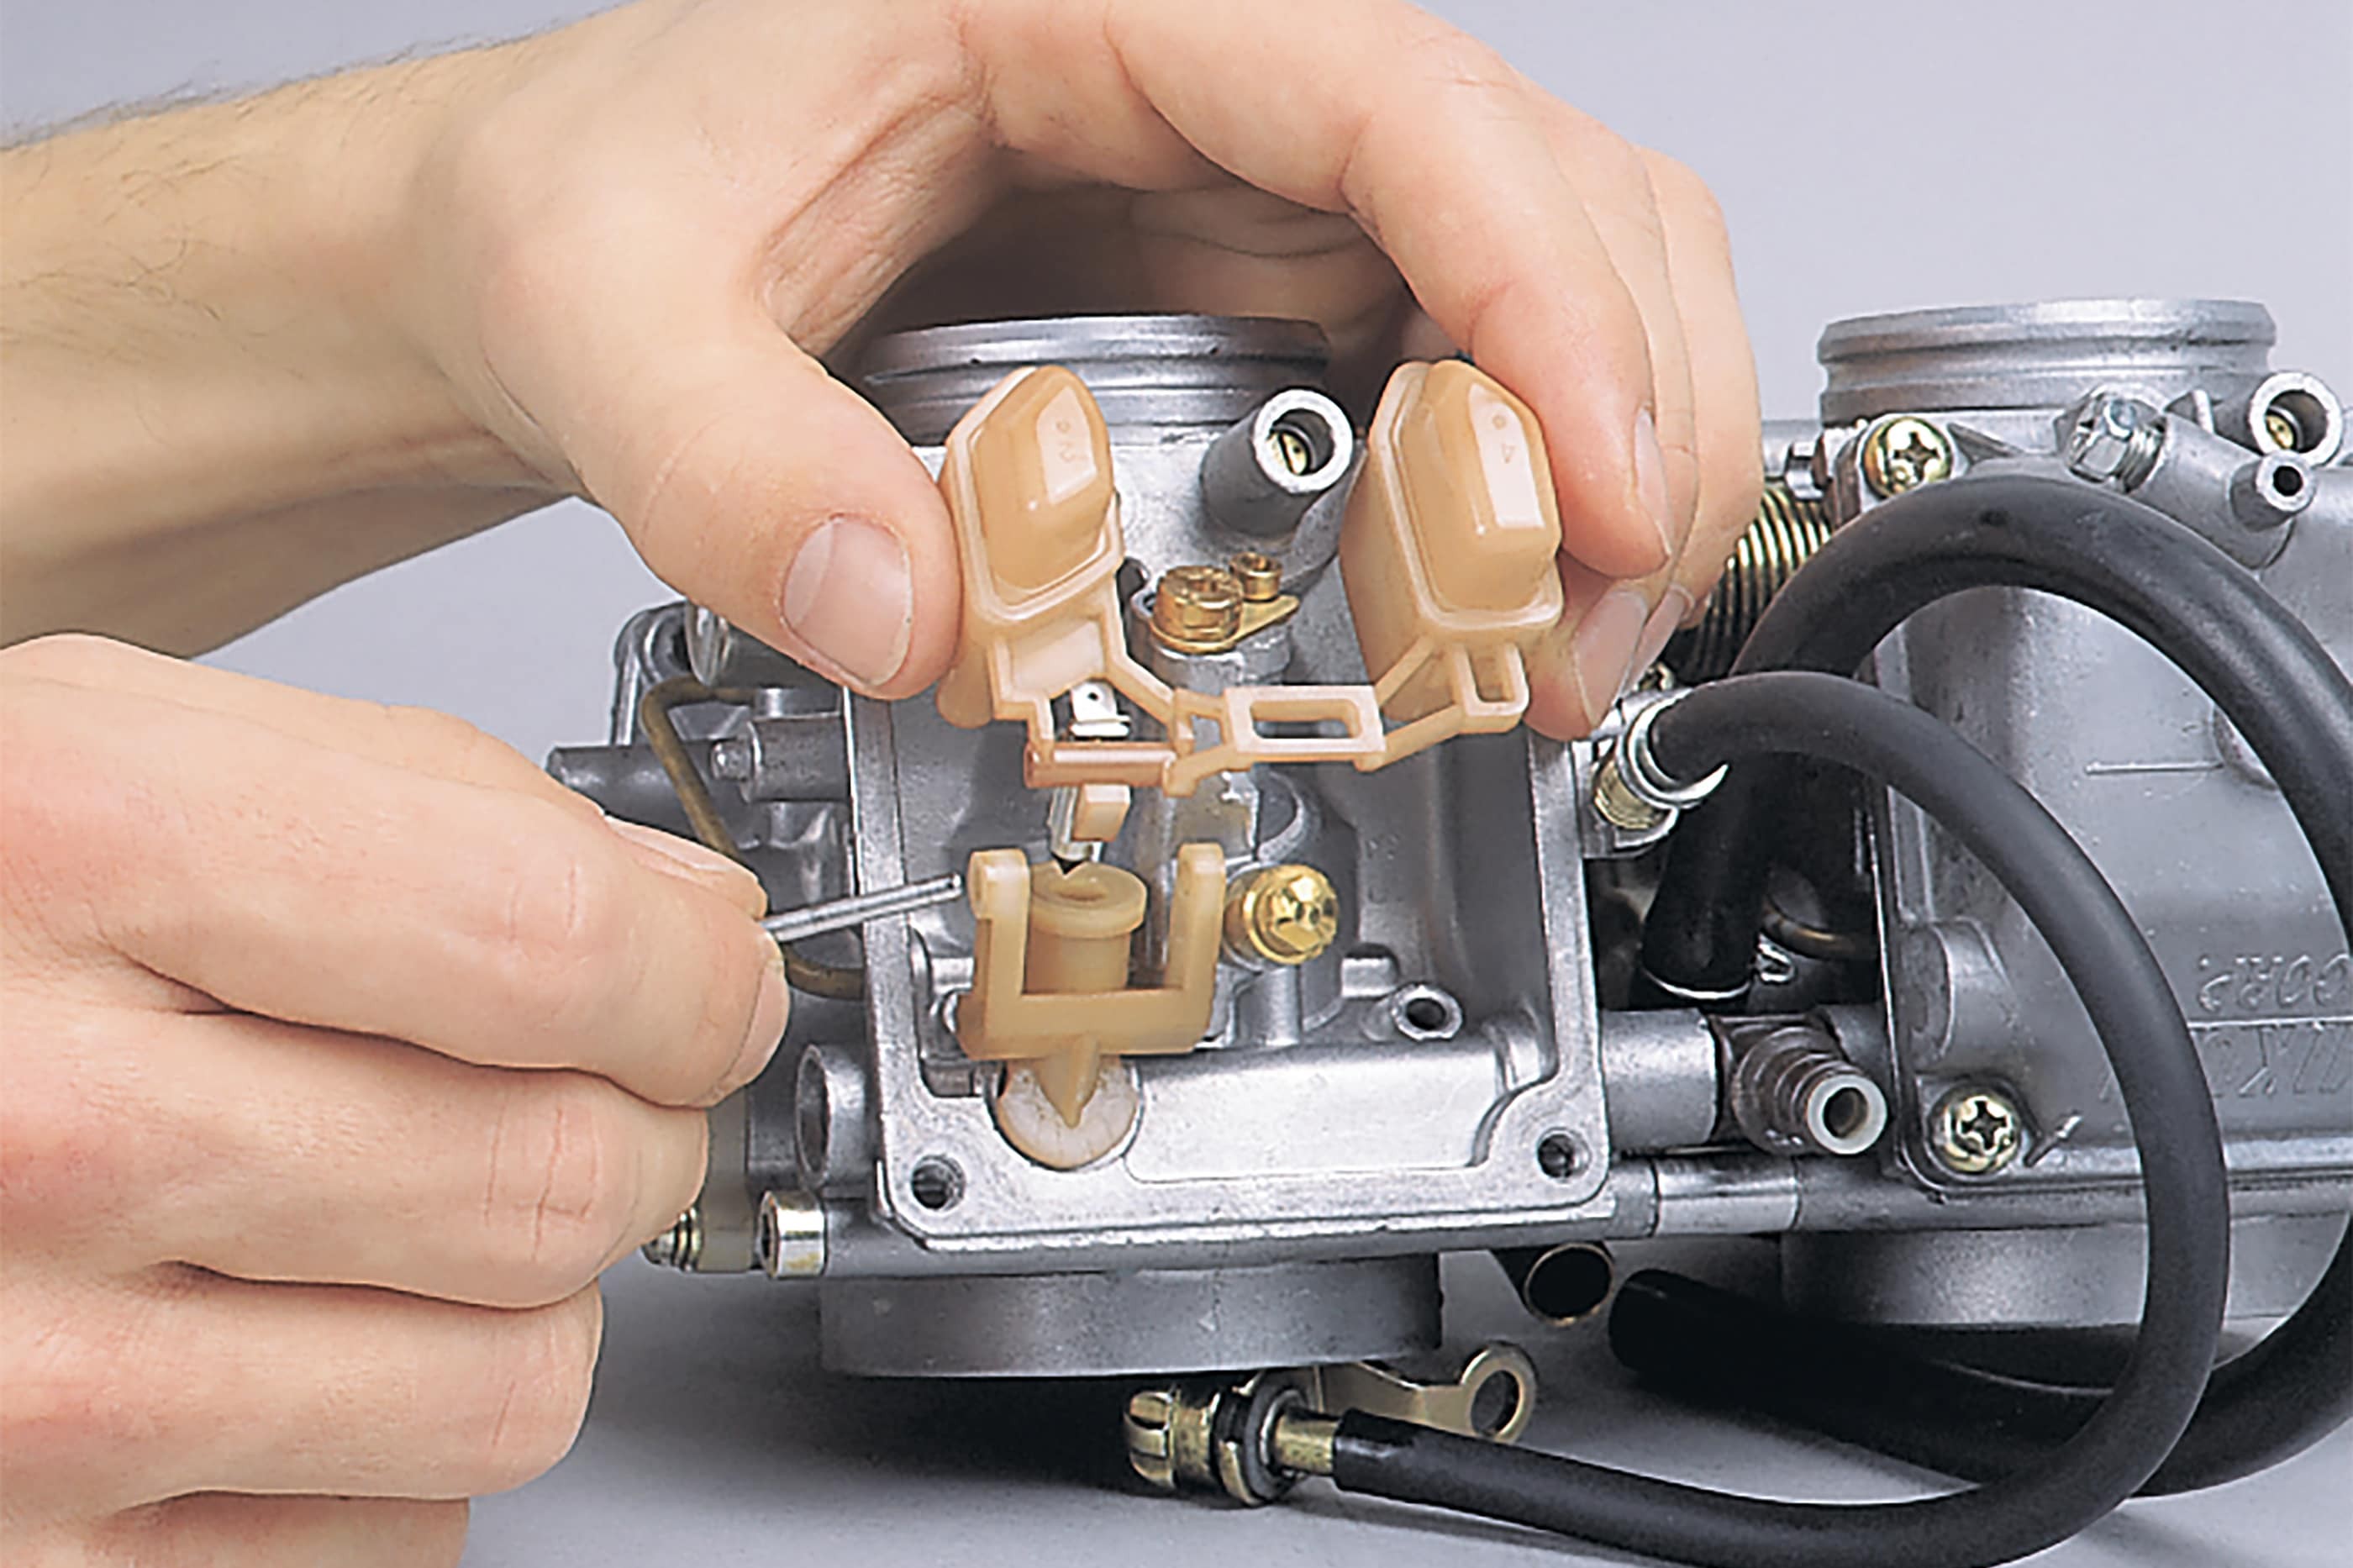
Once the float chamber cover is off, you then need to remove the float in order to change the float needle valve. A clear sign of a worn float needle valve is a ring-shaped pressure mark on the tip of the float needle which you can feel with your finger nail. This is enough to prevent the needle from sealing fully. The float axle can be pushed out to one side, disconnecting the carburettor housing and float. Note the installation position of the float and the attachment of the needle valve to the float. If you get it mixed up, then use a carburettor that you haven't dismantled yet as a guide (or take a photo before you start).
Step 7: Take off carburettor cover and slide valve
07 – Take off carburettor cover and slide valve
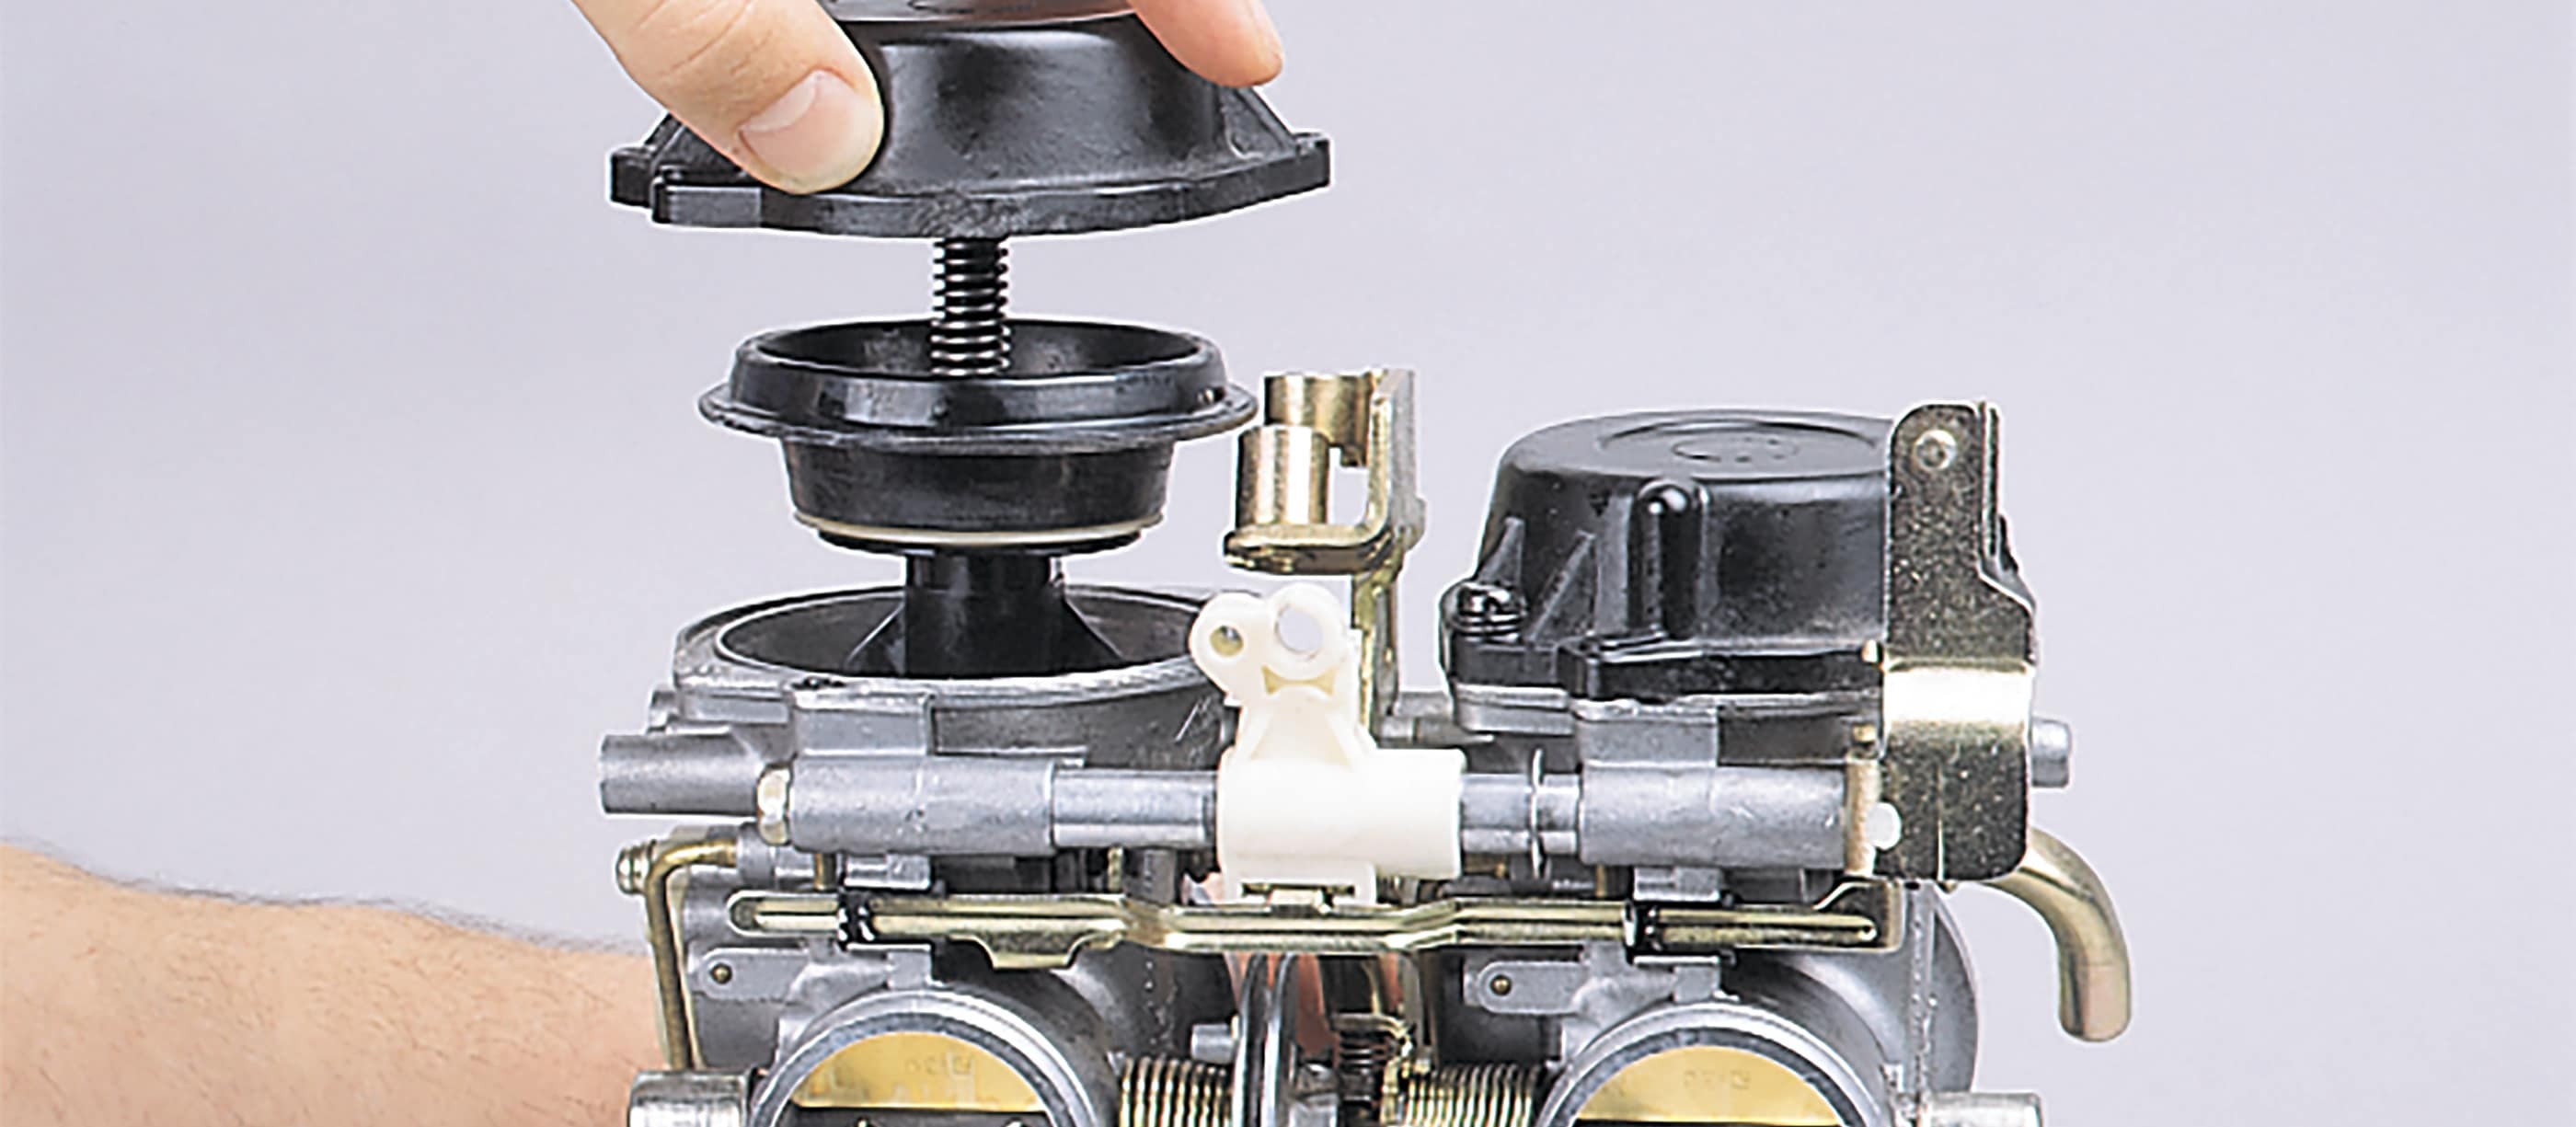
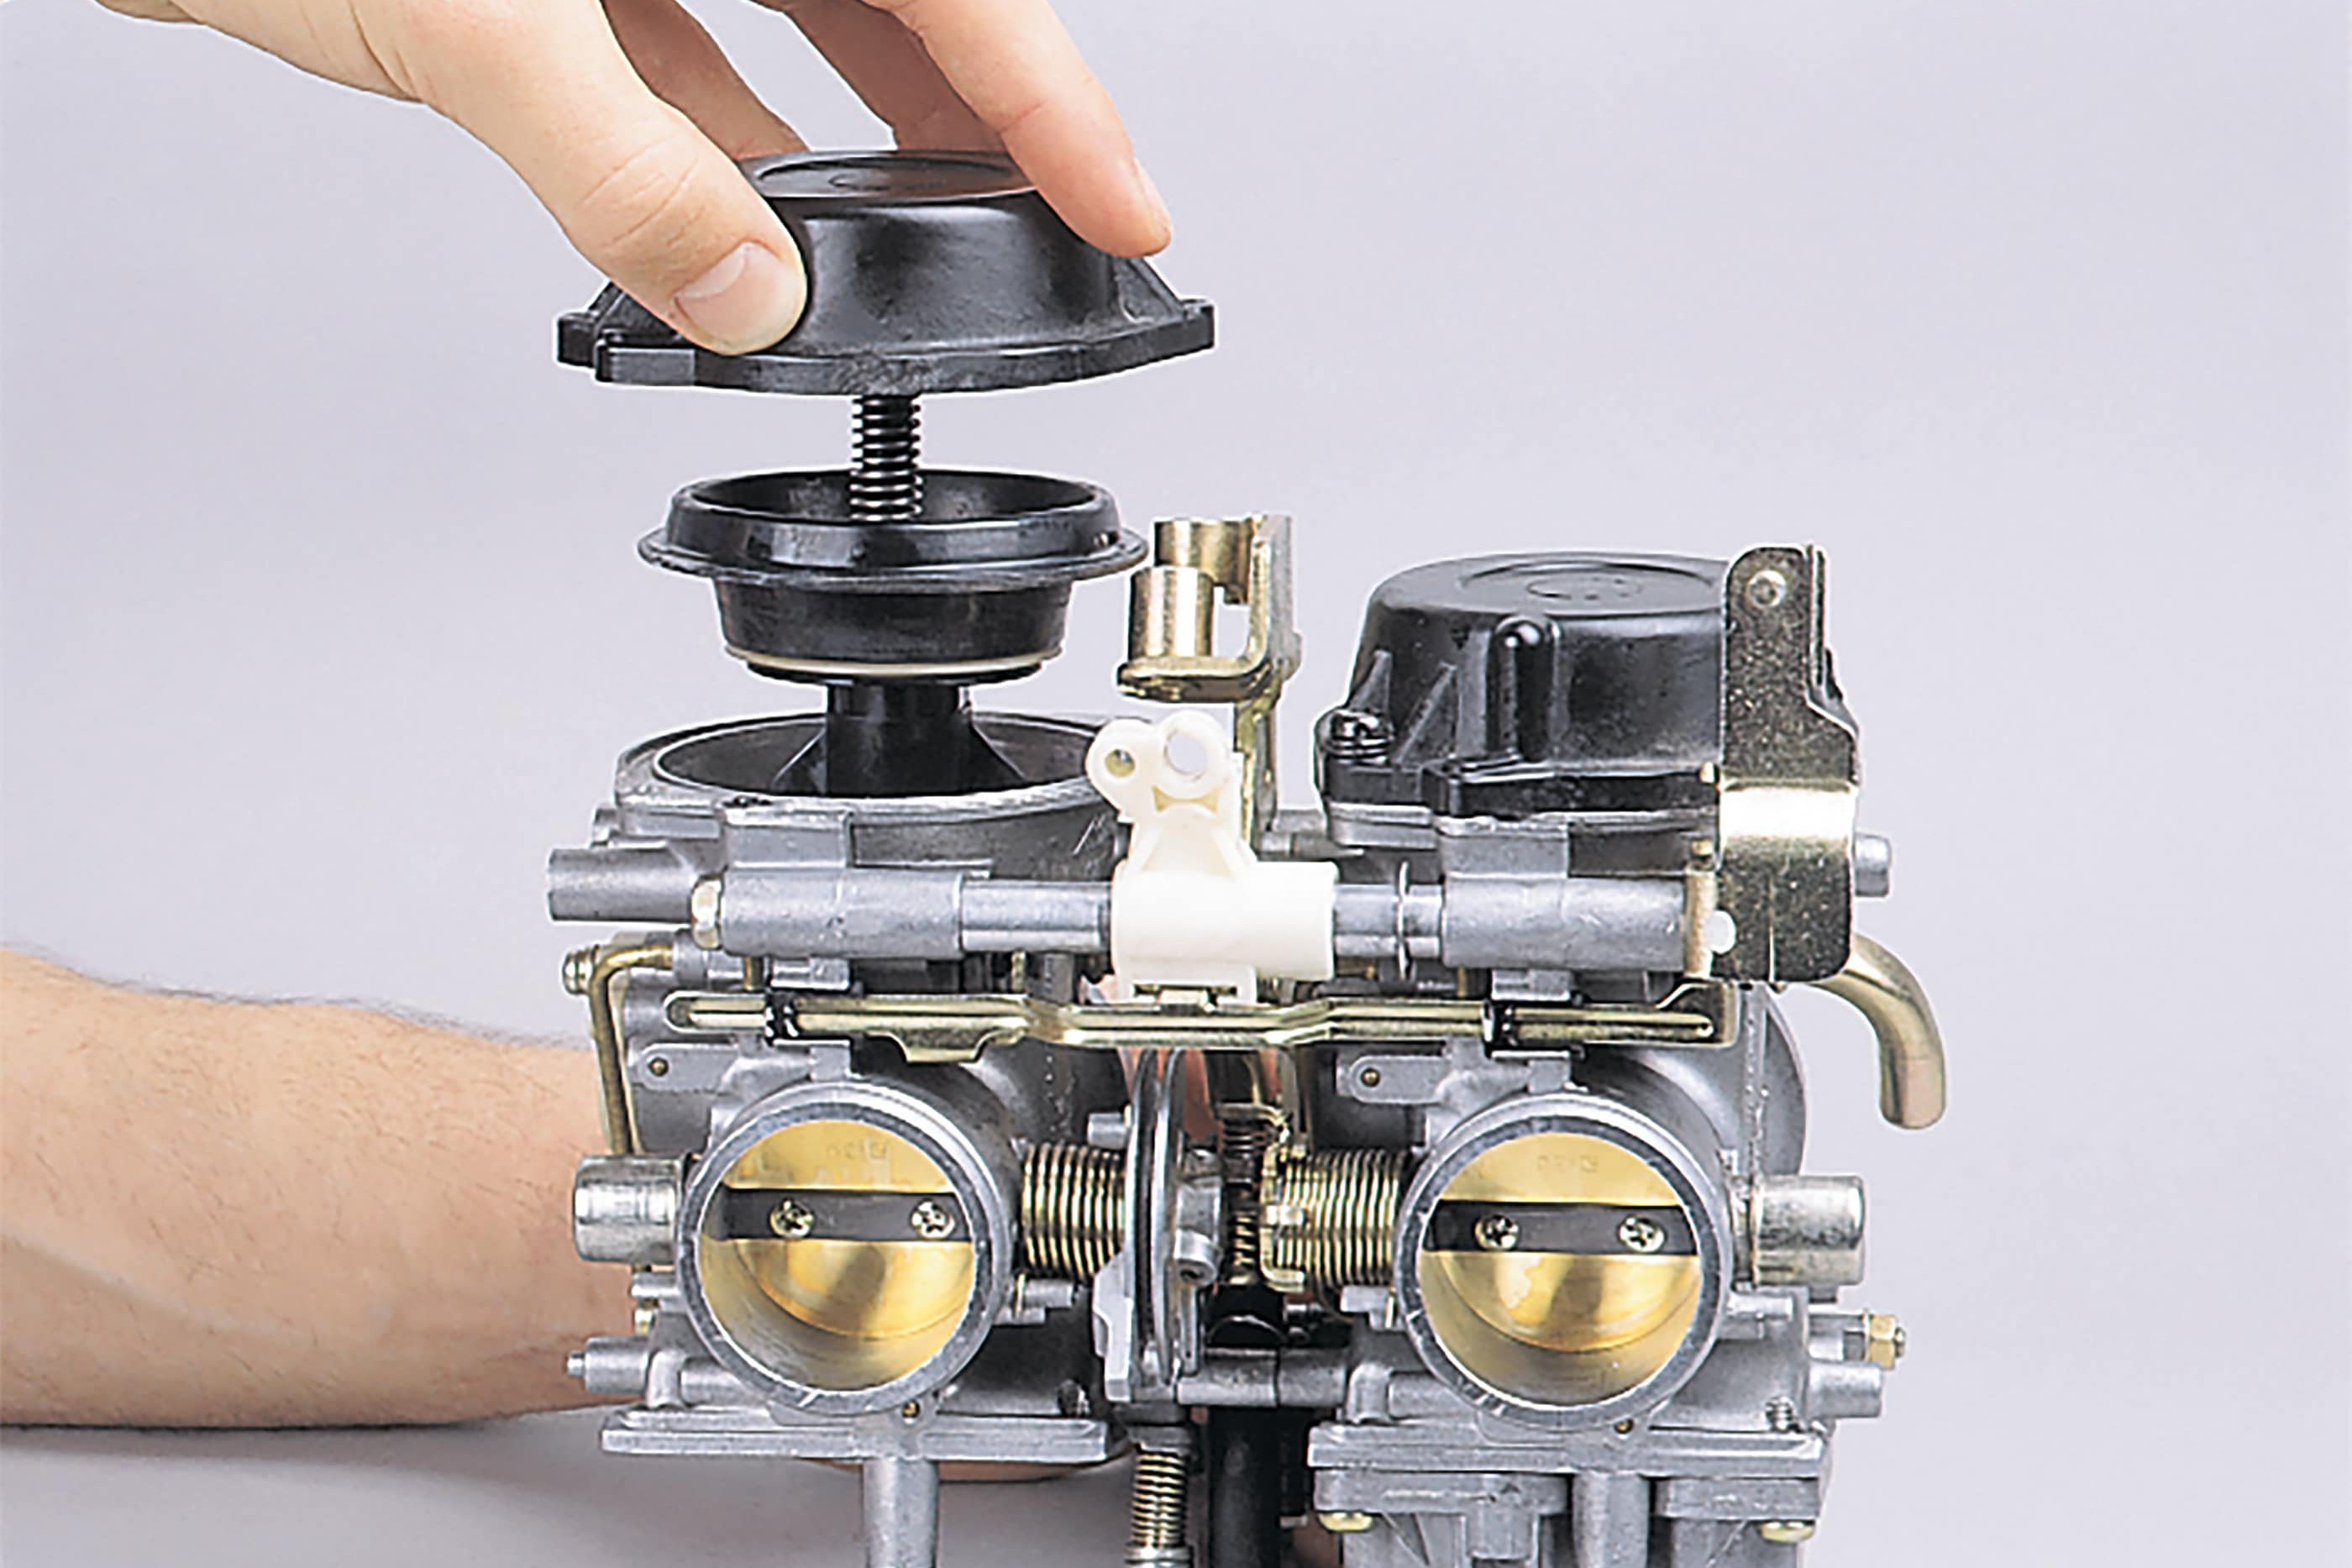
Now for the top of the carburettor: Here the slide valve or the vacuum piston should be examined for deep grooves and the diaphragm for cracks. Undo the cover screws and pull out the spring. Now, carefully take out the piston and diaphragm. The diaphragm generally has an indentation or protruding lip. It determines the installation position and will only fit at one point of the carburettor housing.
To check the diaphragm, hold it up to the light and stretch it slightly at all points. If there is a hole, it must be replaced. Damage typically arises at the edges; specifically, at the piston connection or the outer edge of the diaphragm. Another possible fault is over-expansion of the diaphragm due to vapours, in which case it will feel very soft and is much too large to reinstall. The only solution is to fit a new one. If the diaphragms are not available individually, they must be bought together with the slide valve/piston.
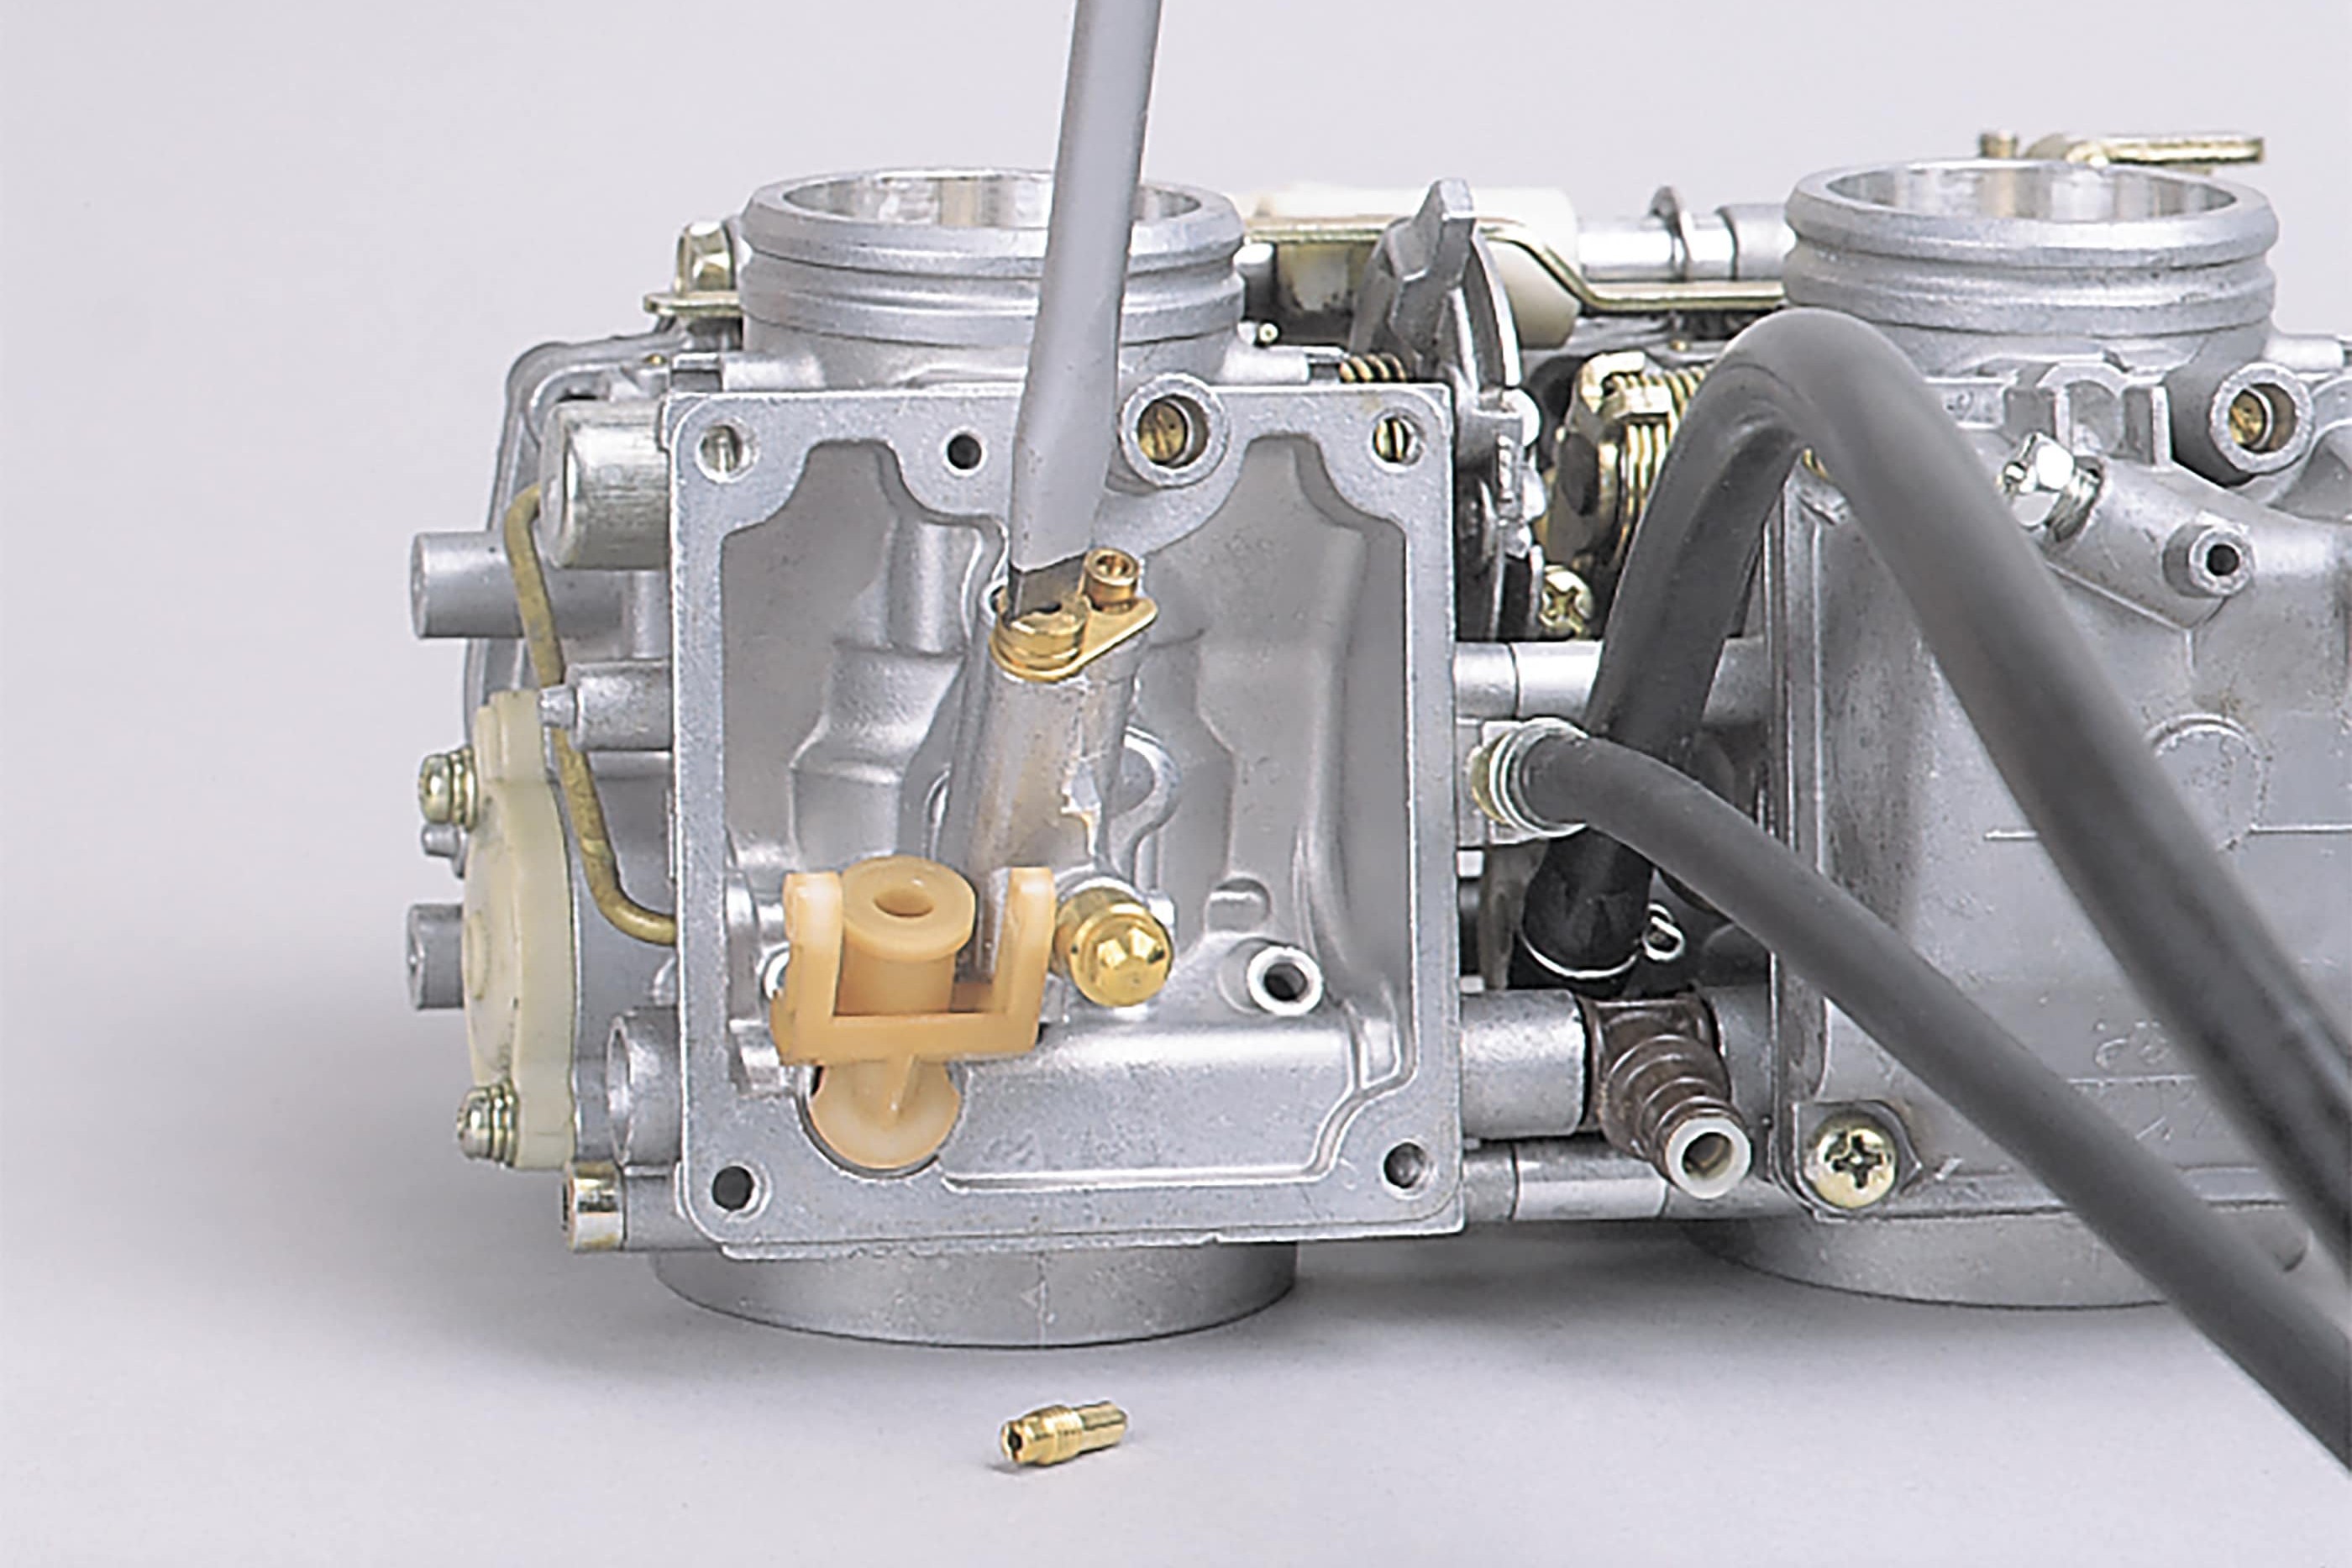
Step 8: Unscrew jets
08 – Unscrew jets
Back to the bottom: For a proper clean, remove all screw-type jets. Caution: The jets are made of brass and will only accept precisely the right size of tool.
To clean jets, it is best not to use wire, as it can easily widen the soft jet material. Instead, spray them well and blow them out with compressed air. Afterwards, hold the jets up to the light to see if they are free of dirt. Before removing the idle mixture screws, be sure to do the following: First, turn the screw, while counting the revolutions, until it is sitting loosely in its seat (but do not pull it against the seat to avoid causing damage). Make a note of the number turns for the later adjustment. Now you can remove the adjustment screw. After cleaning, the rubber ring of the adjustment screw must be replaced with a new one. To install the screw, screw it in until it sits lightly (!) in its seat, and then unscrew it the number of revolutions you counted before.
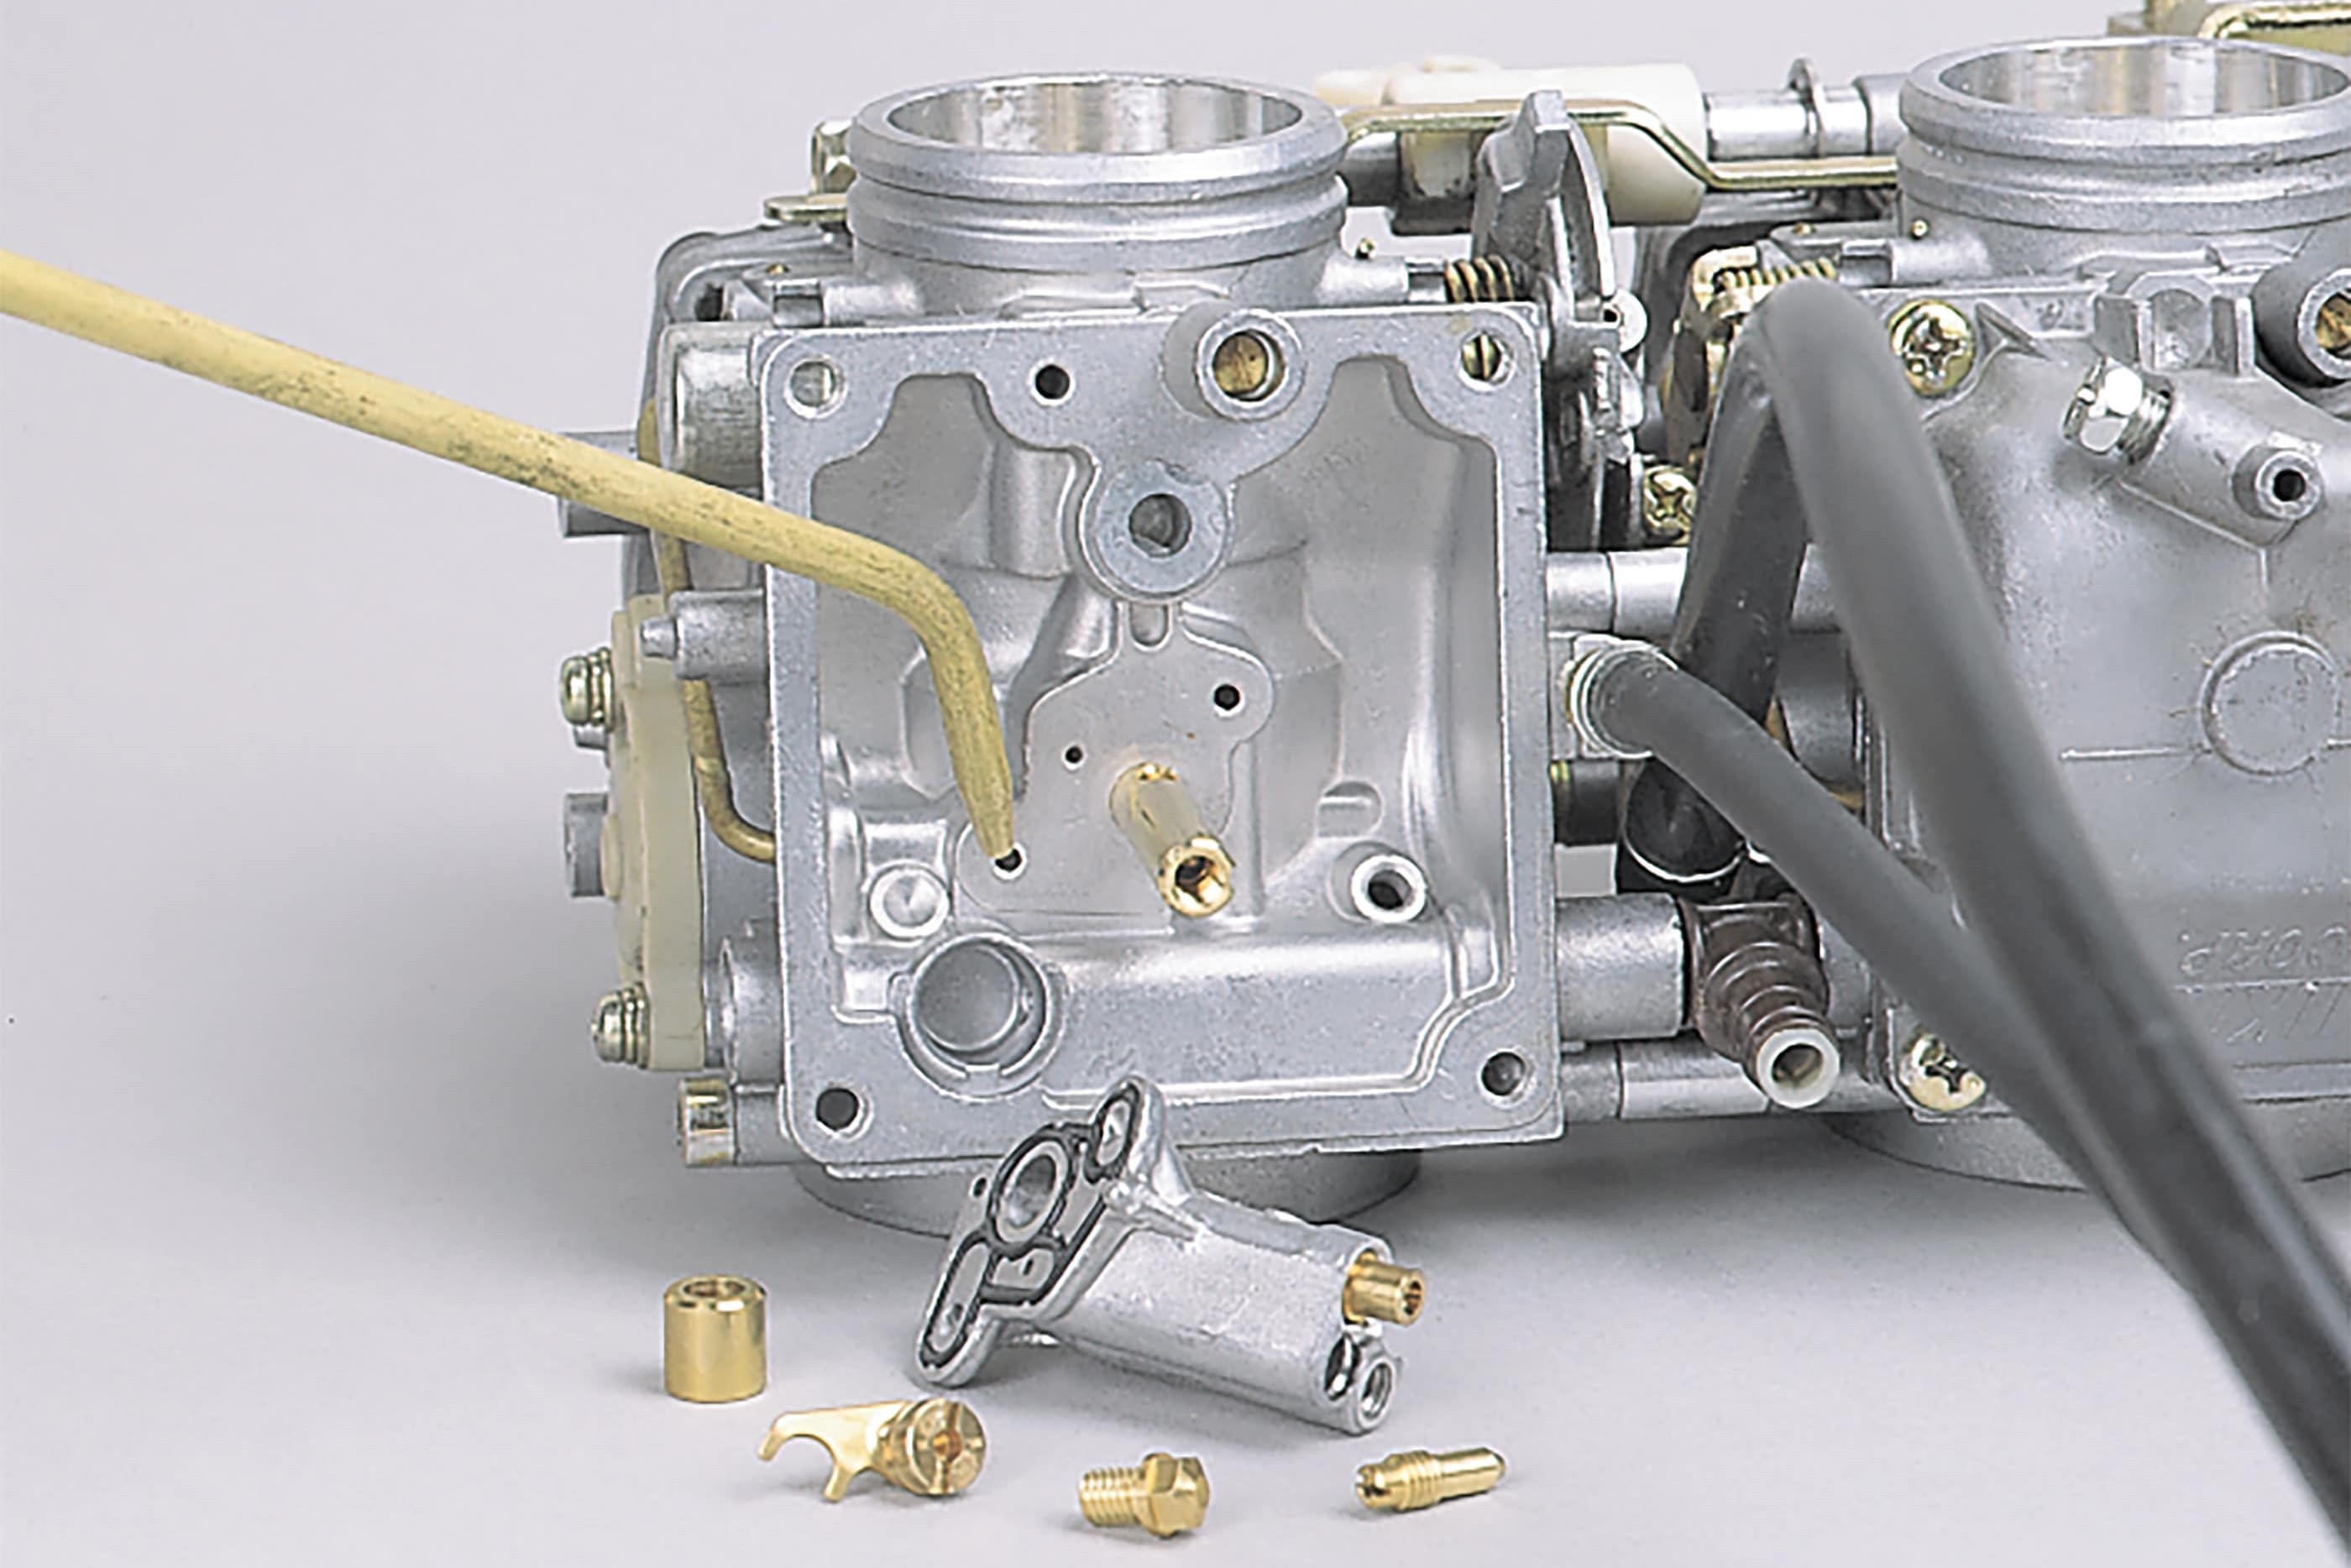
Step 9: Blow out bores with compressed air
09 – Blow out bores with compressed air
A cleaning spray will take care of the deposits. Generously spray each bore of the carburettor. After leaving it to work for a short time, blow out all bores with compressed air if possible. If you do not have a compressor, the best thing to do is go to a filling station, where you will probably be able to use the compressed air for a small charge. Take care not to lose any small parts when blowing out the bores!
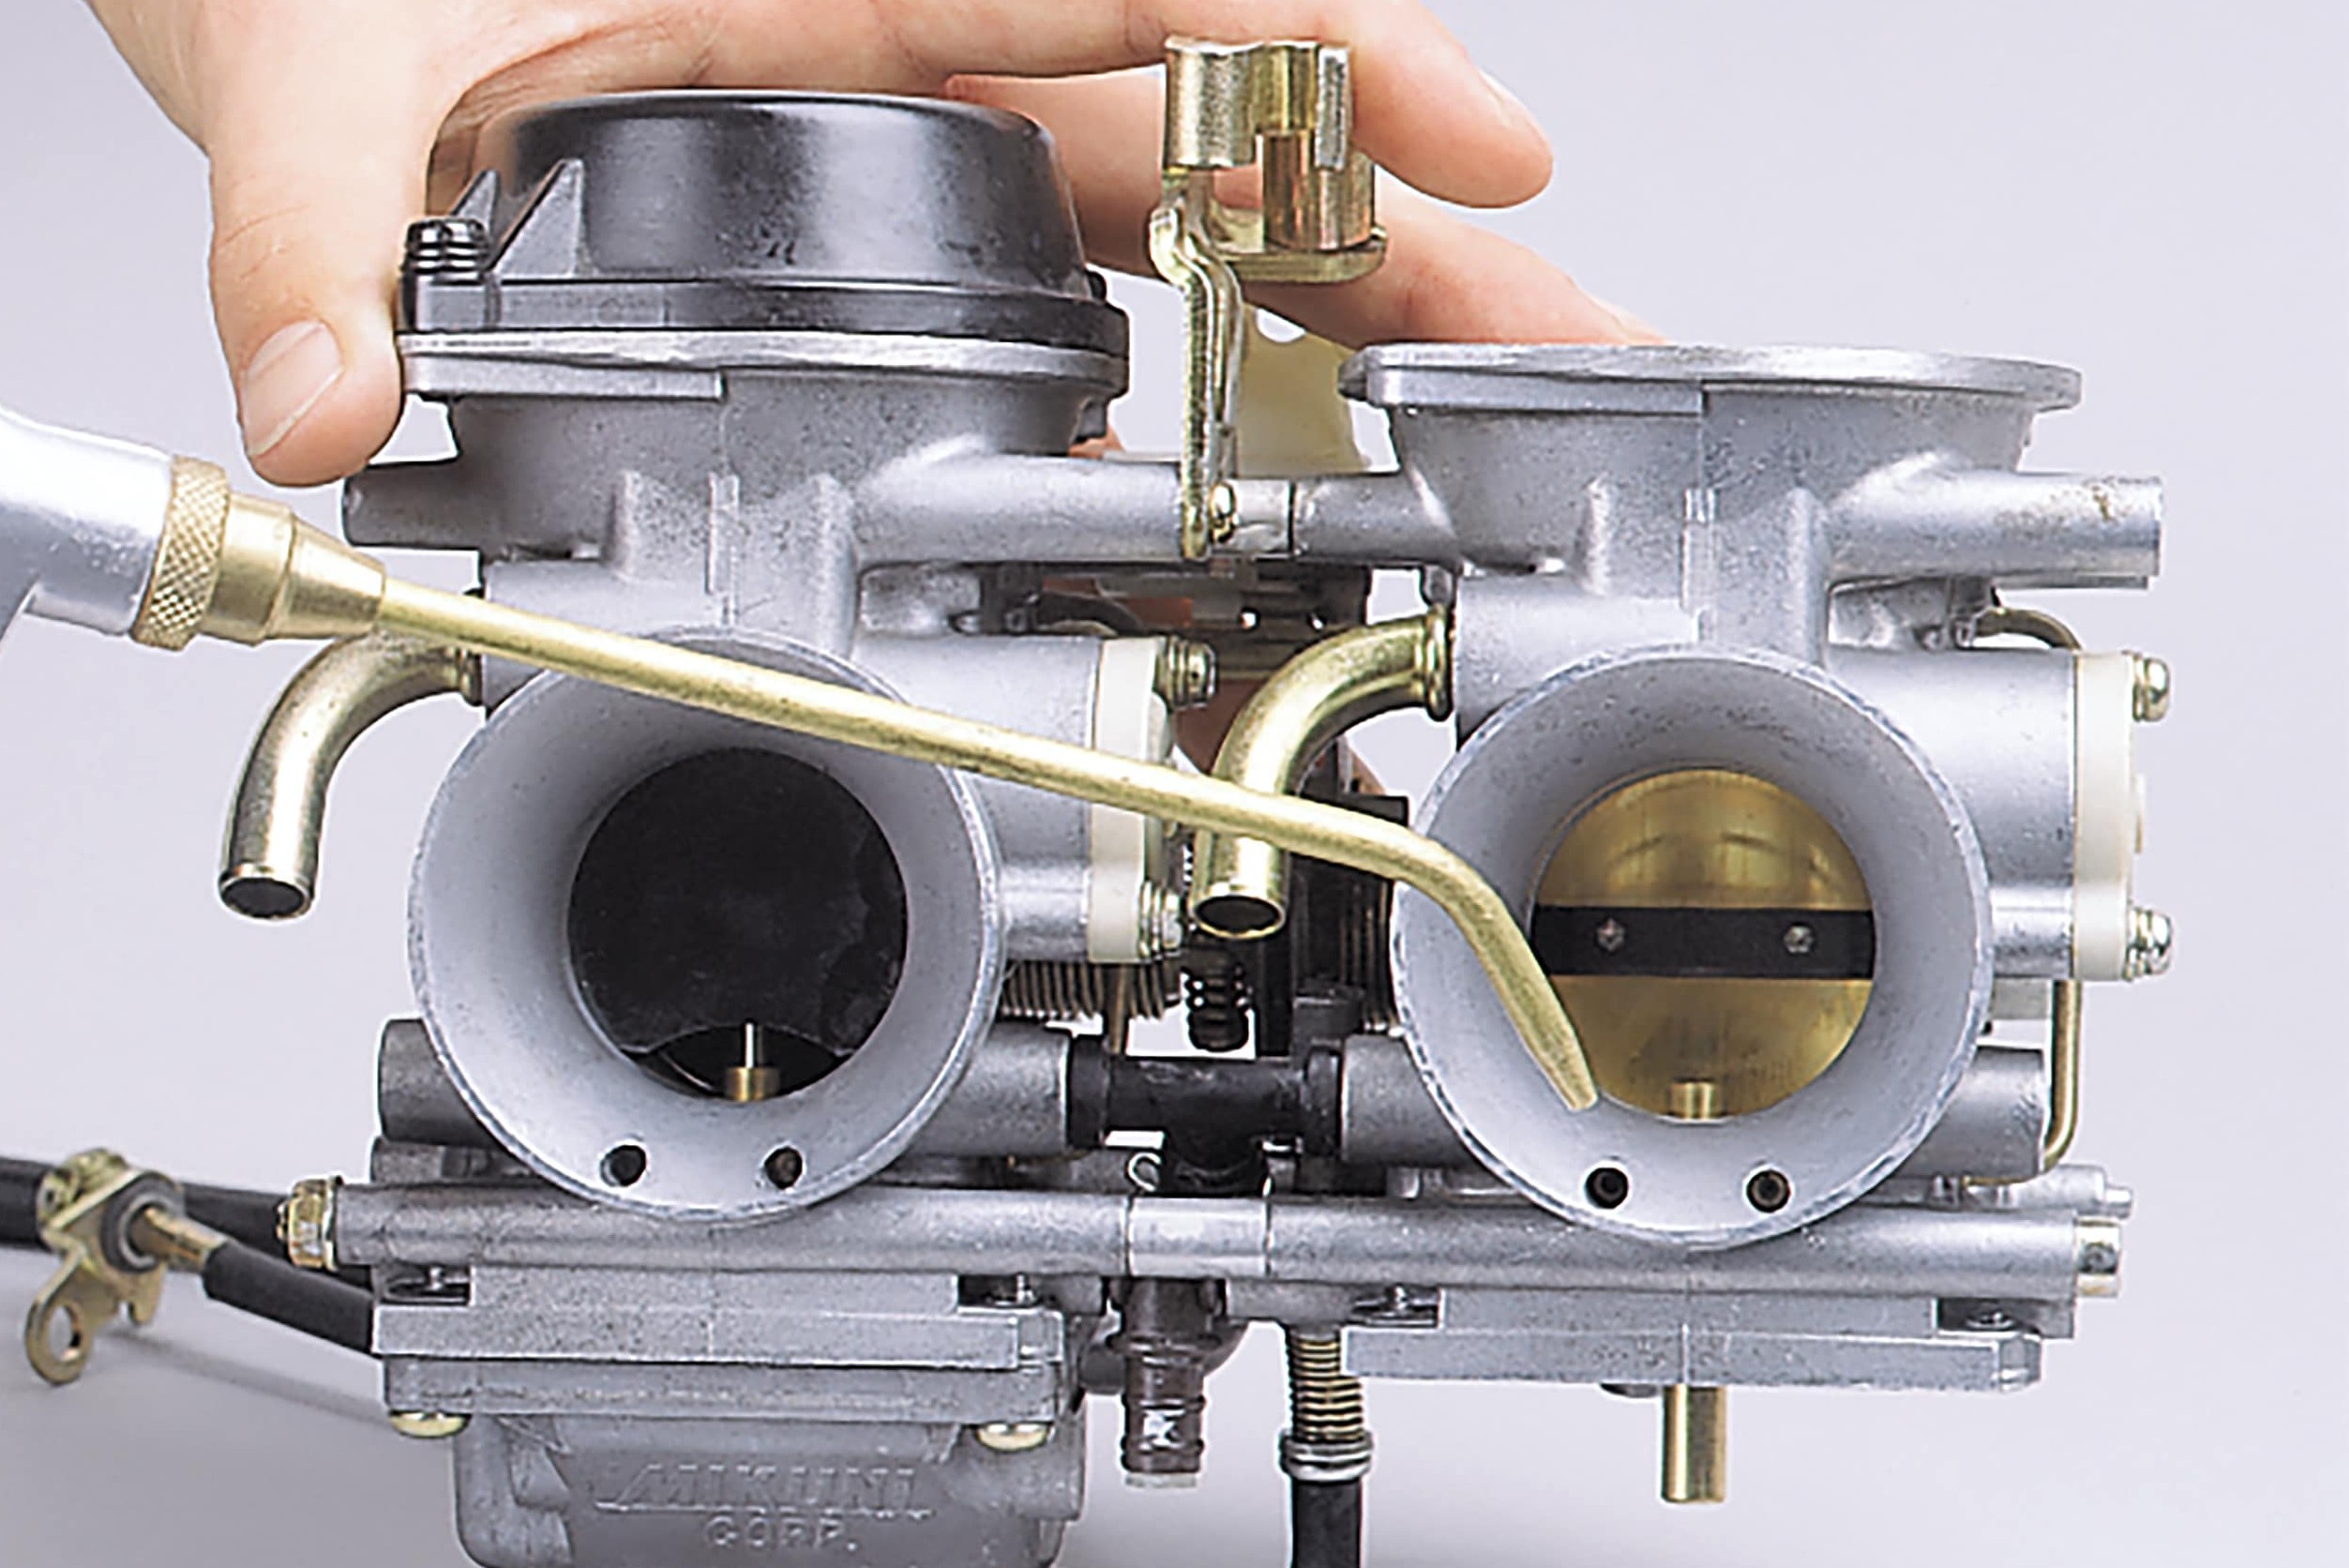
Step 10: Do not forget these bores
10 – Do not forget these bores
Often overlooked, but very important, are the additional bores on the air inlet and mixture discharge nozzle of the carburettors.
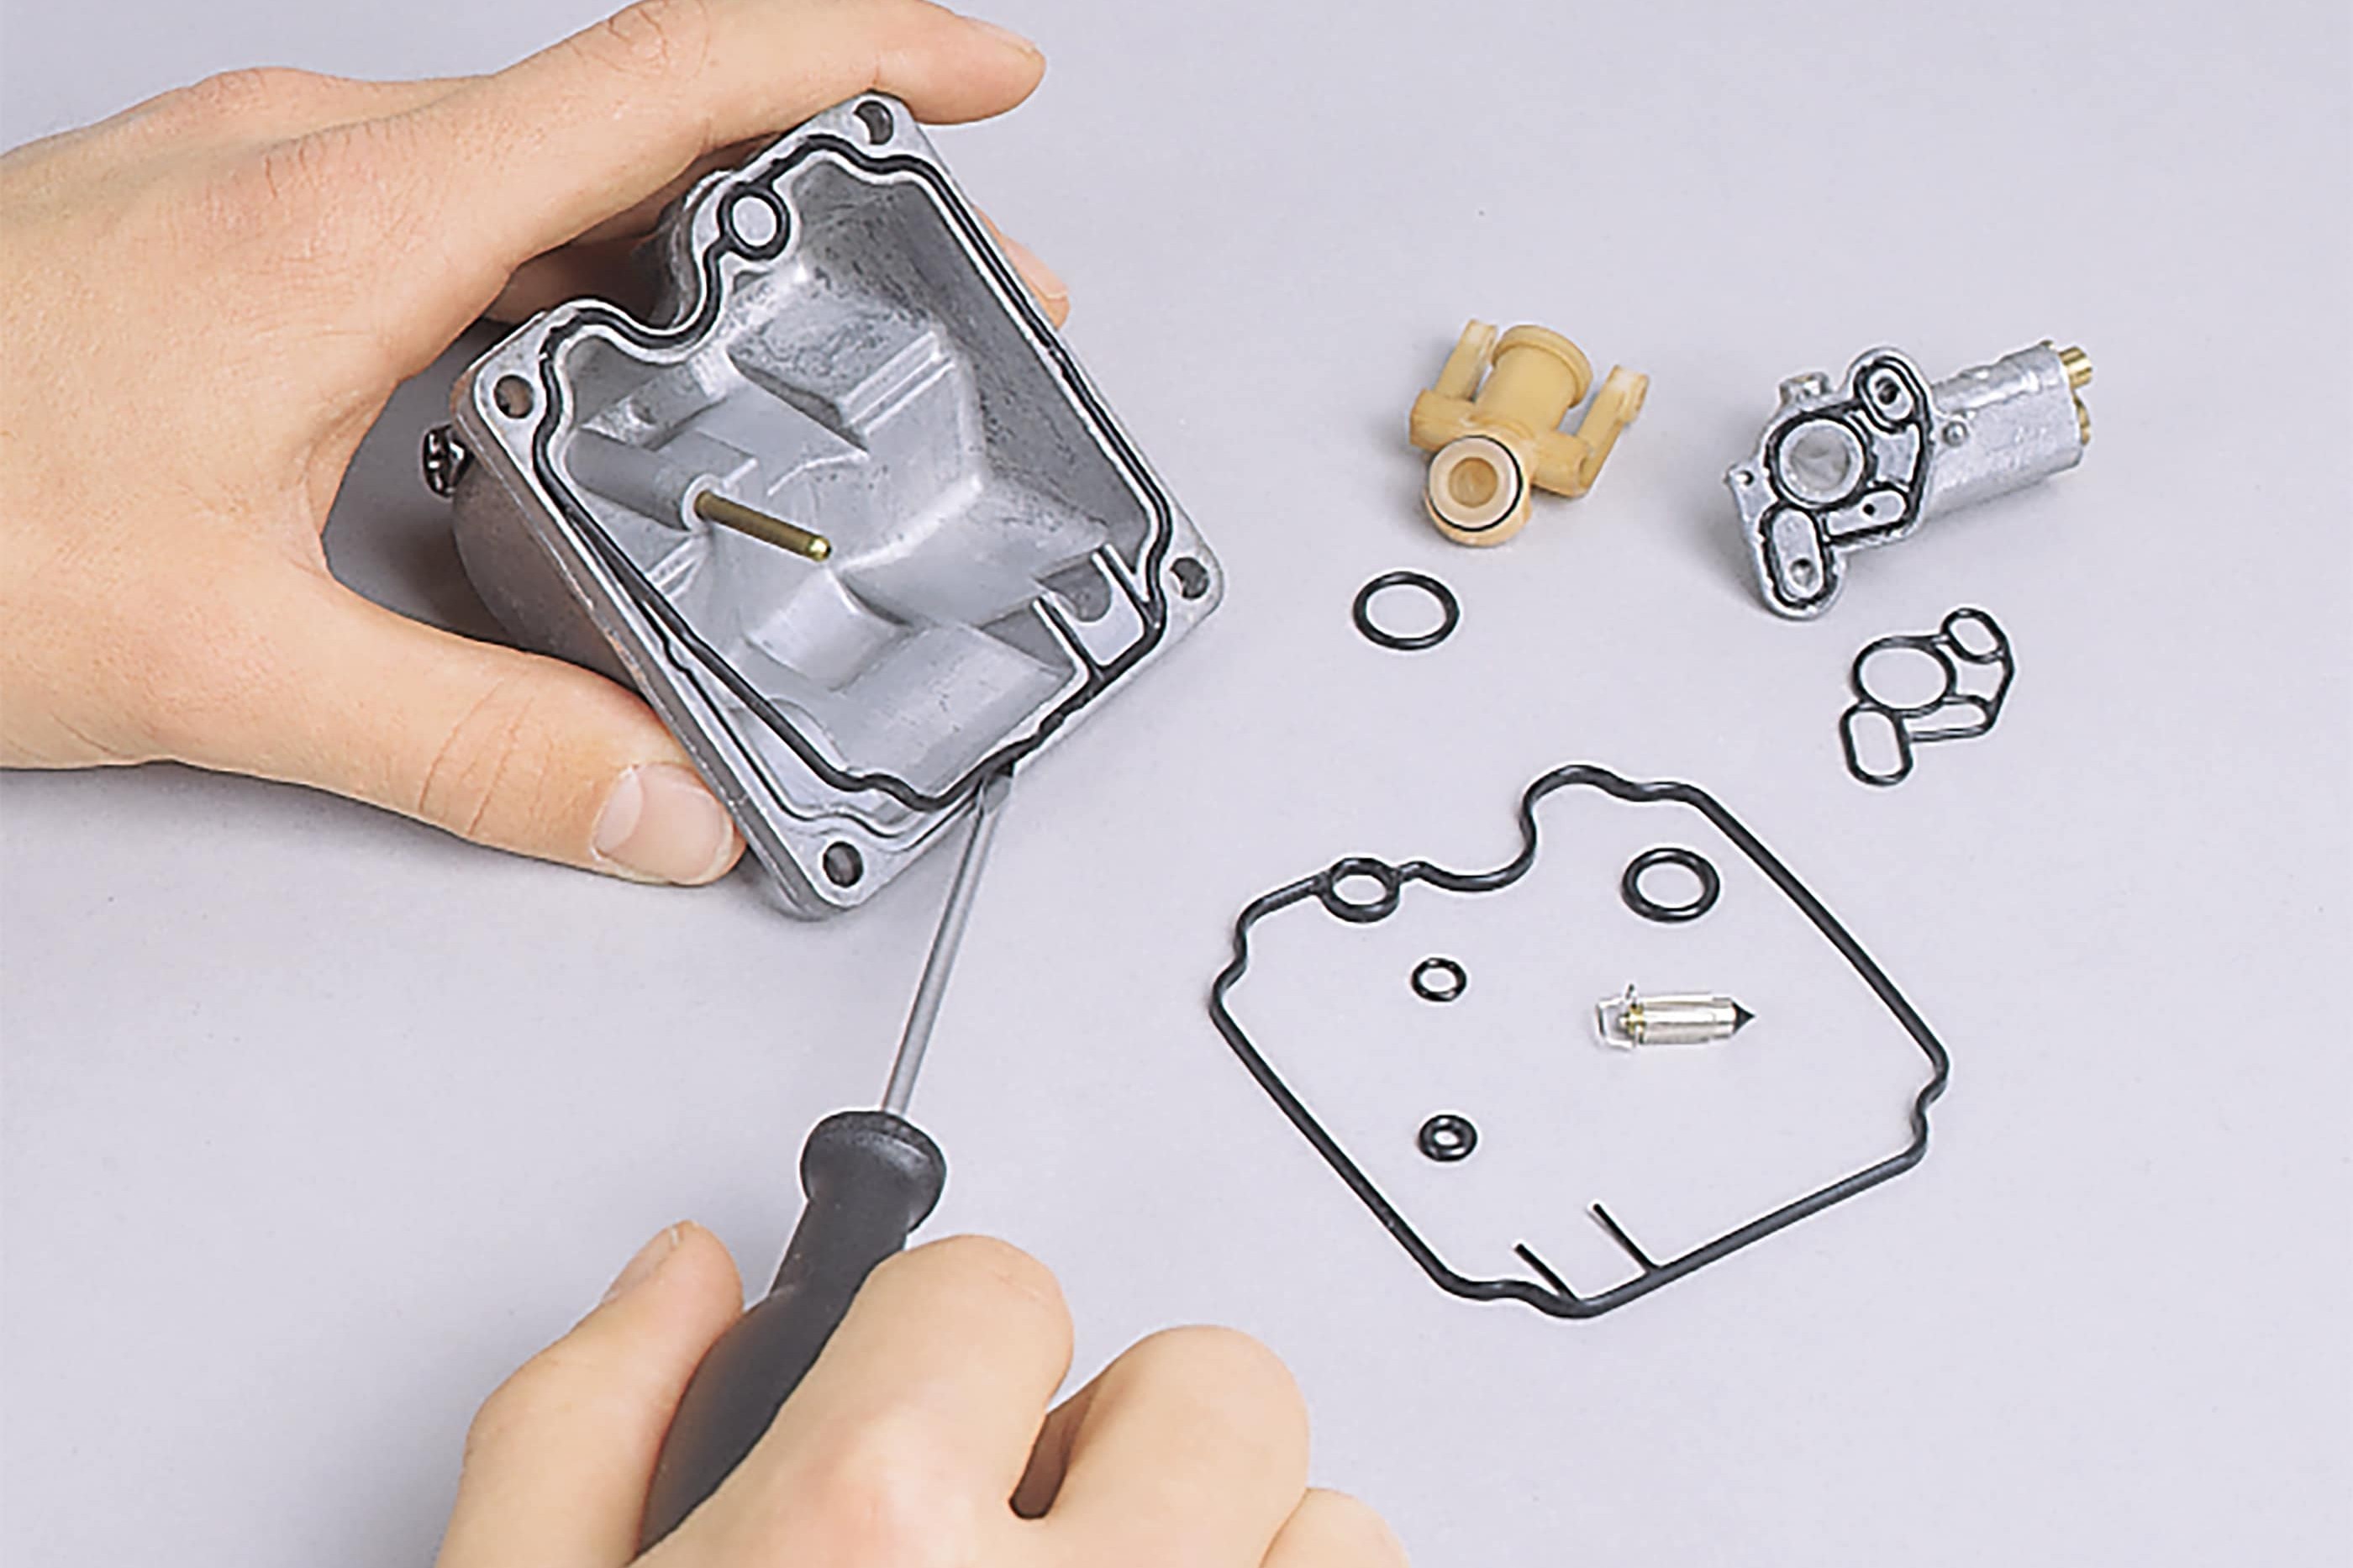
Step 11: Fit new gaskets
11 – Fit new gaskets
The seal rings and gaskets to be replaced are removed with a small screwdriver. When installing the new seal rings, make sure that they sit correctly in the grooves provided.
Step 12: Hook in float needle
12 – Hook in float needle
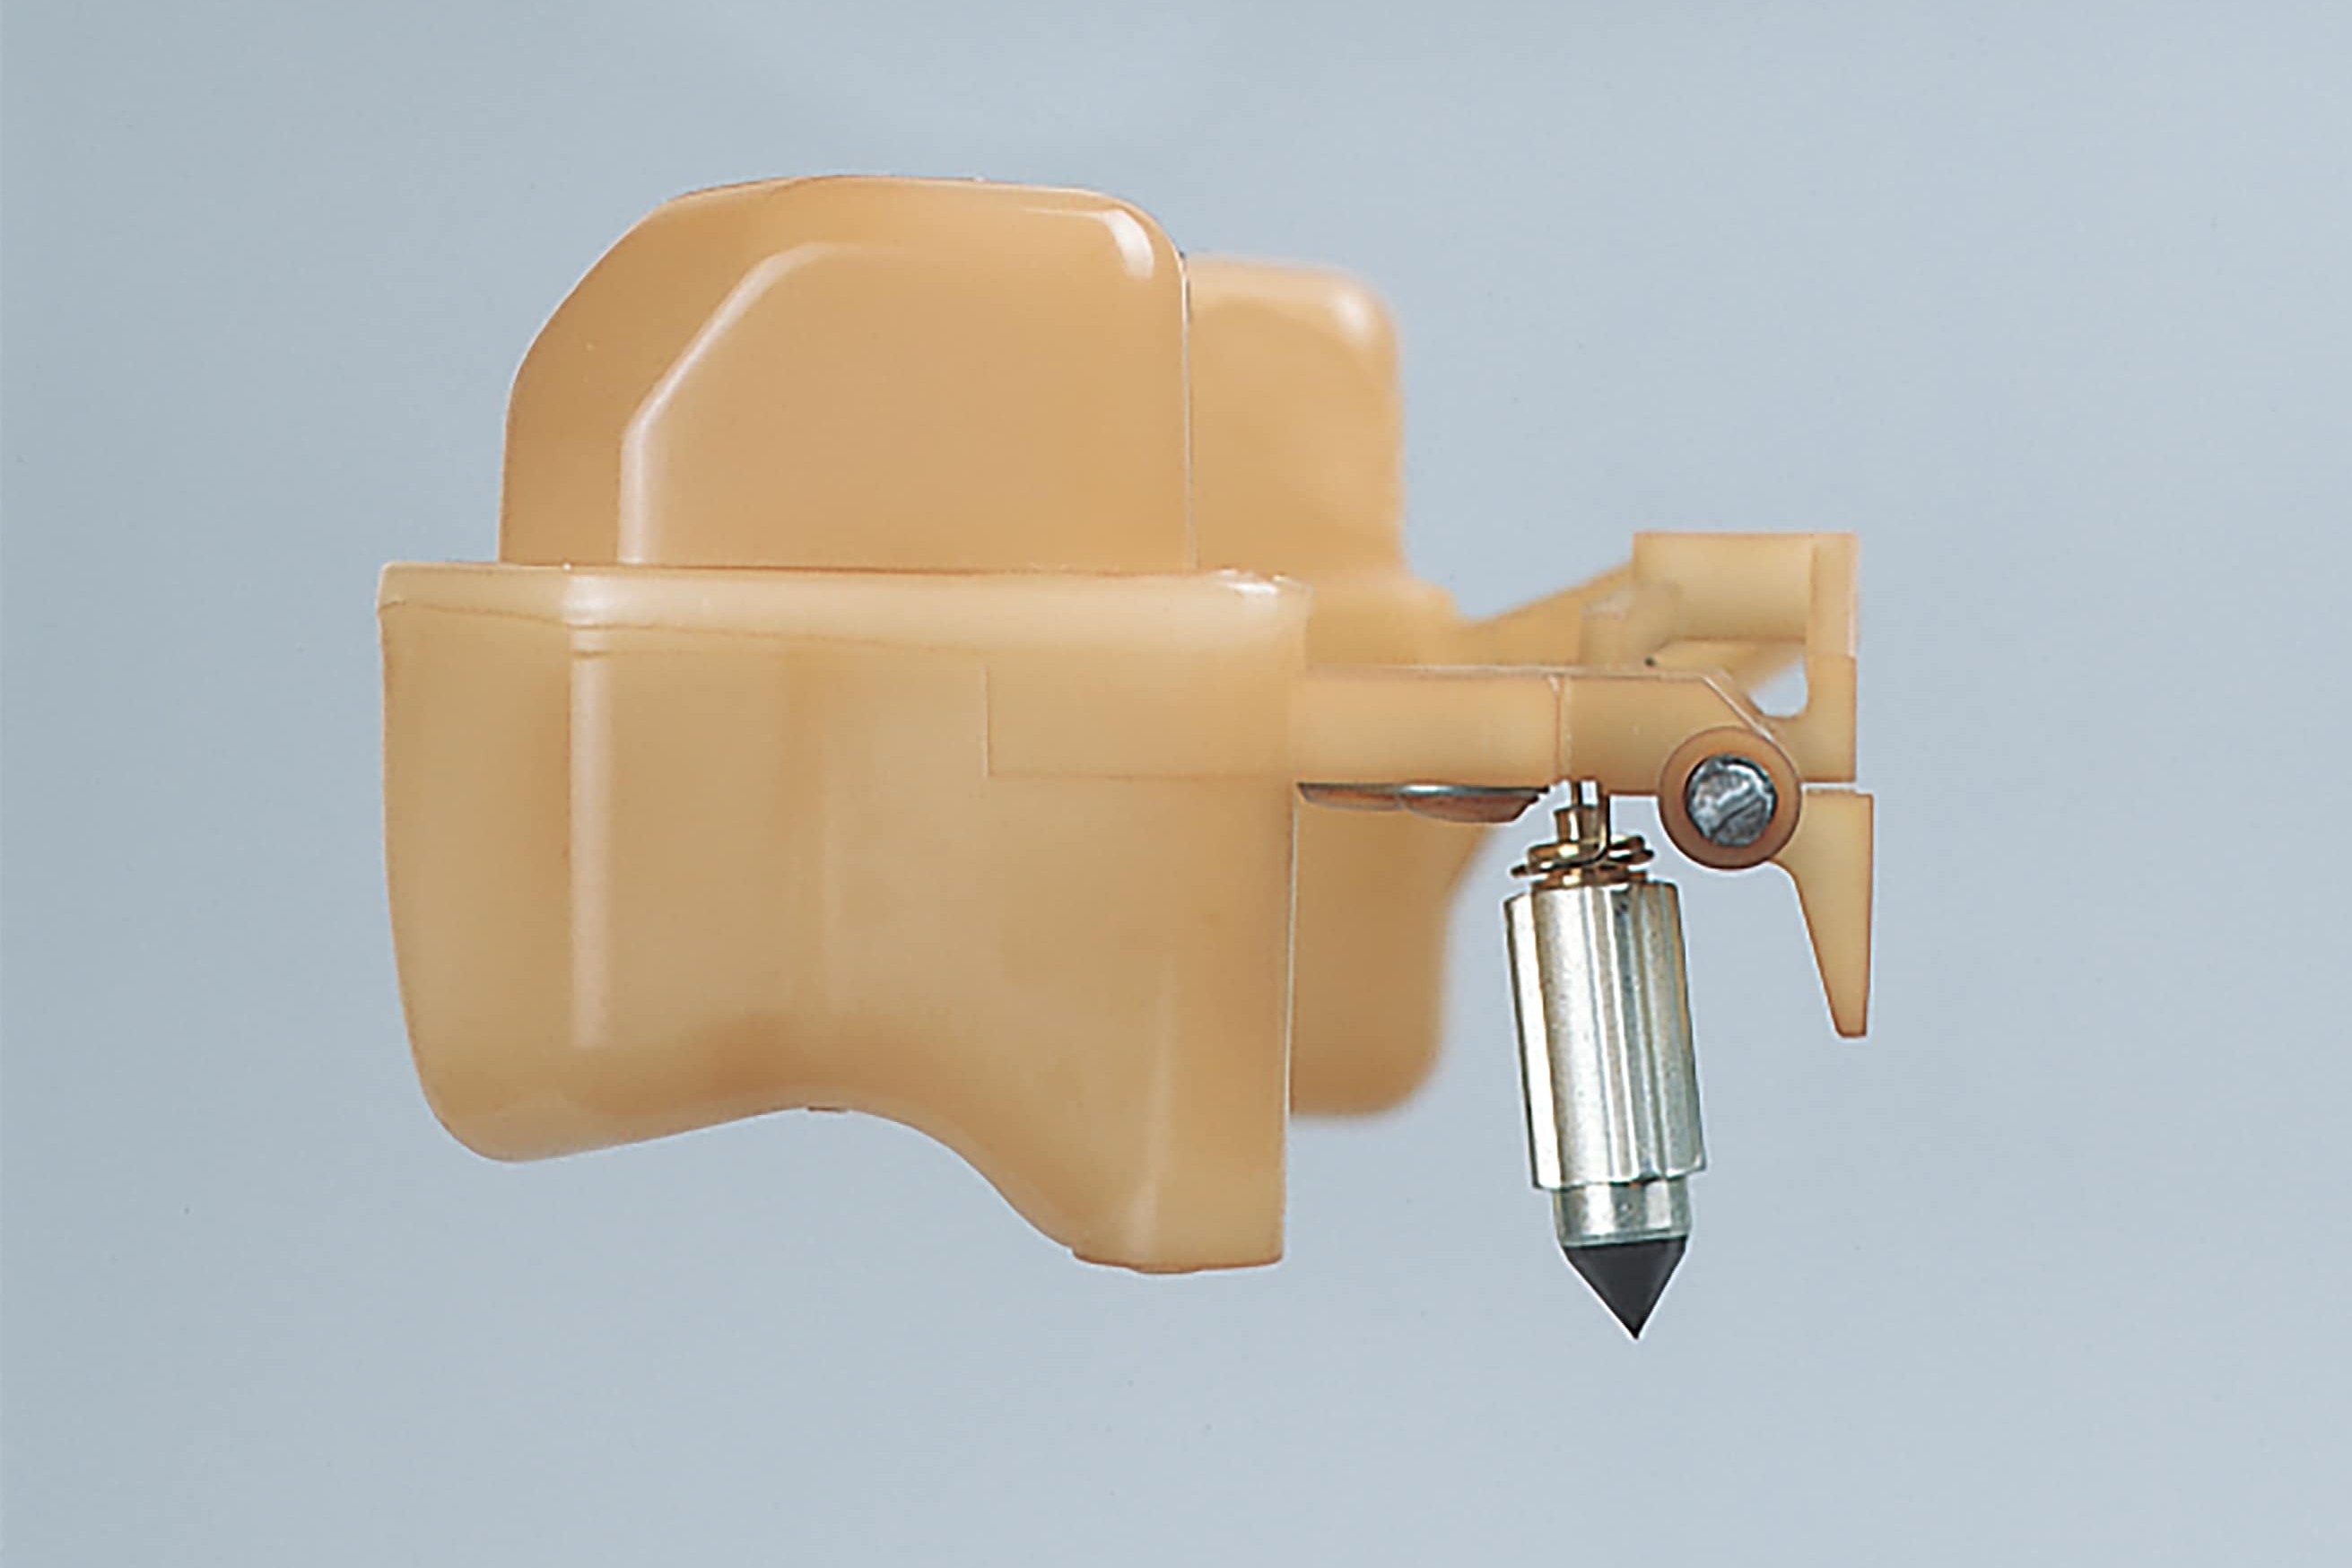
Once you have screwed all the jets back in and replaced the seal rings, hook a new float needle into the float and reinstall. If removed, re-insert the slide valve or the piston with diaphragm and jet needle carefully into the carburettor housing, and check that the diaphragm is correctly seated.
Step 13: Re-grease all rotating parts
13 – Re-grease all rotating parts
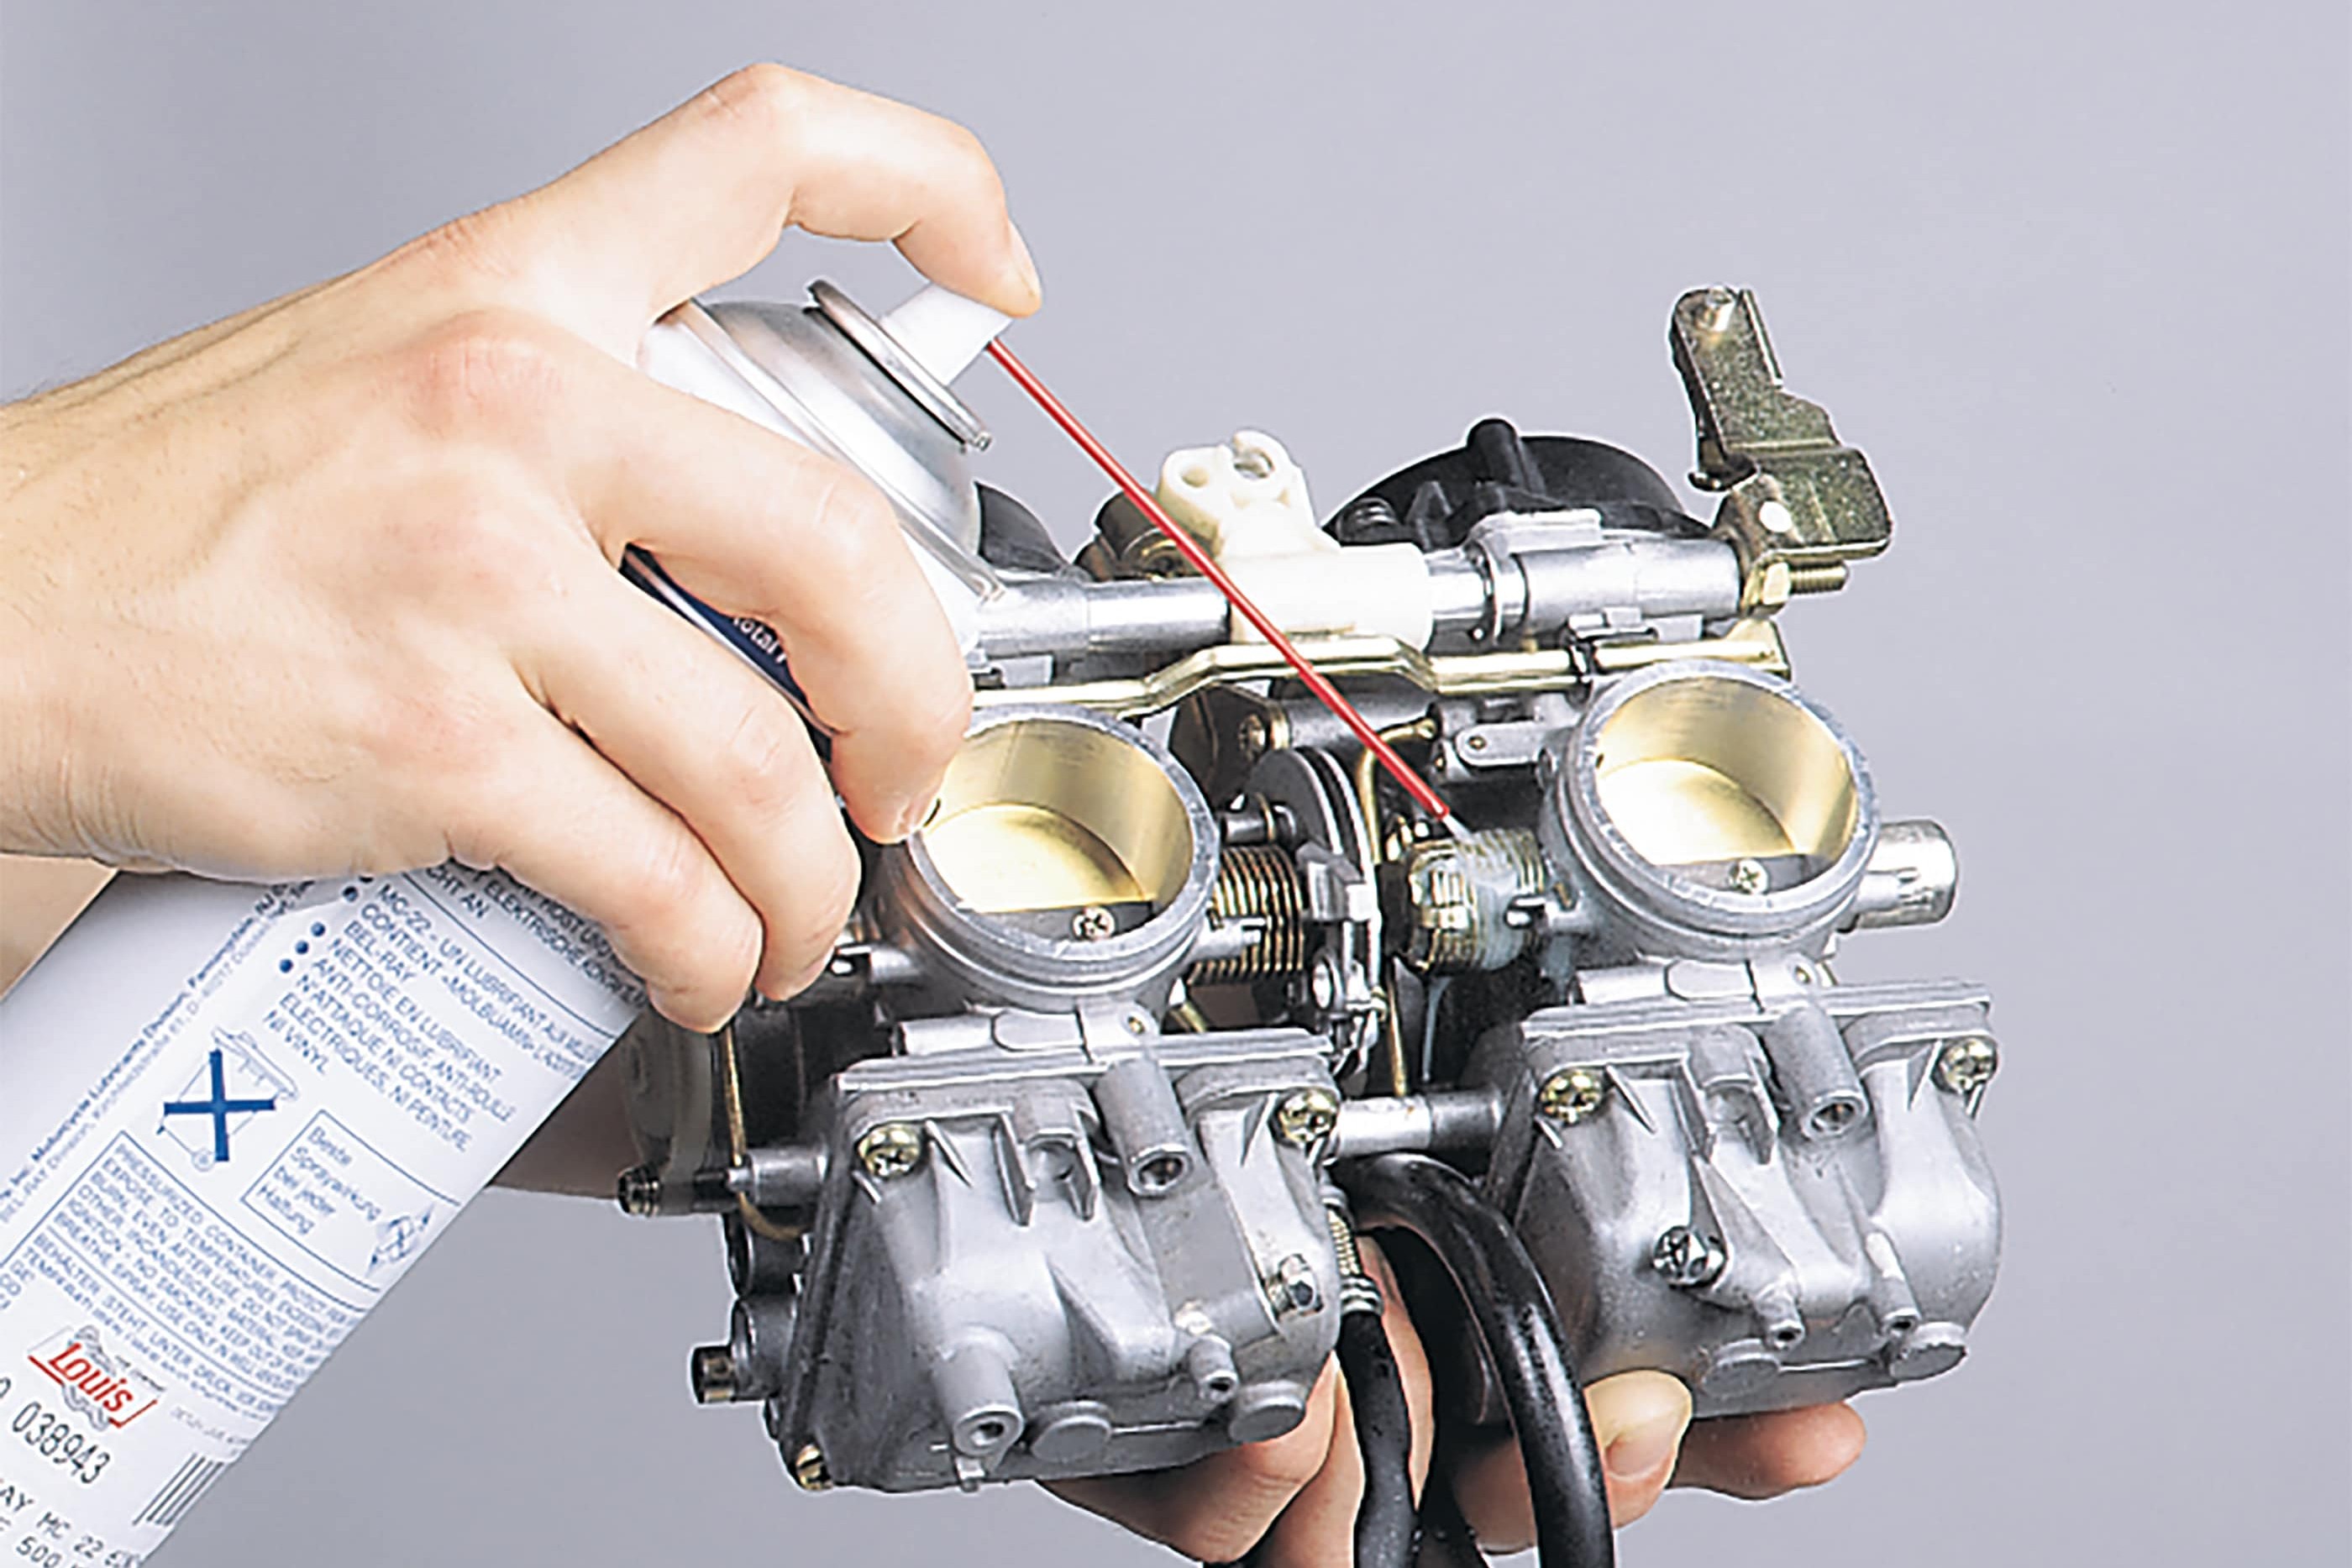
Before mounting the carburettors in the intake manifolds, all rotating parts must be lightly lubricated with Teflon (PTFE) spray because cleaning will have removed all trace of lubricant. When installing the carburettors, be sure to position them correctly in the intake rubbers and make sure nothing gets trapped (cables, etc.). Once the clamps are properly tightened (tight, but not too tight), reconnect the choke cable, throttle cable, fuel hose and any other cables. Please make sure that the cables are routed correctly, and readjust the throttle cable and, possibly, choke cable, to the right amount of play (see the motorcycle owner's manual).
Step 14: Synchronise carburettors
14 – Synchronise carburettors
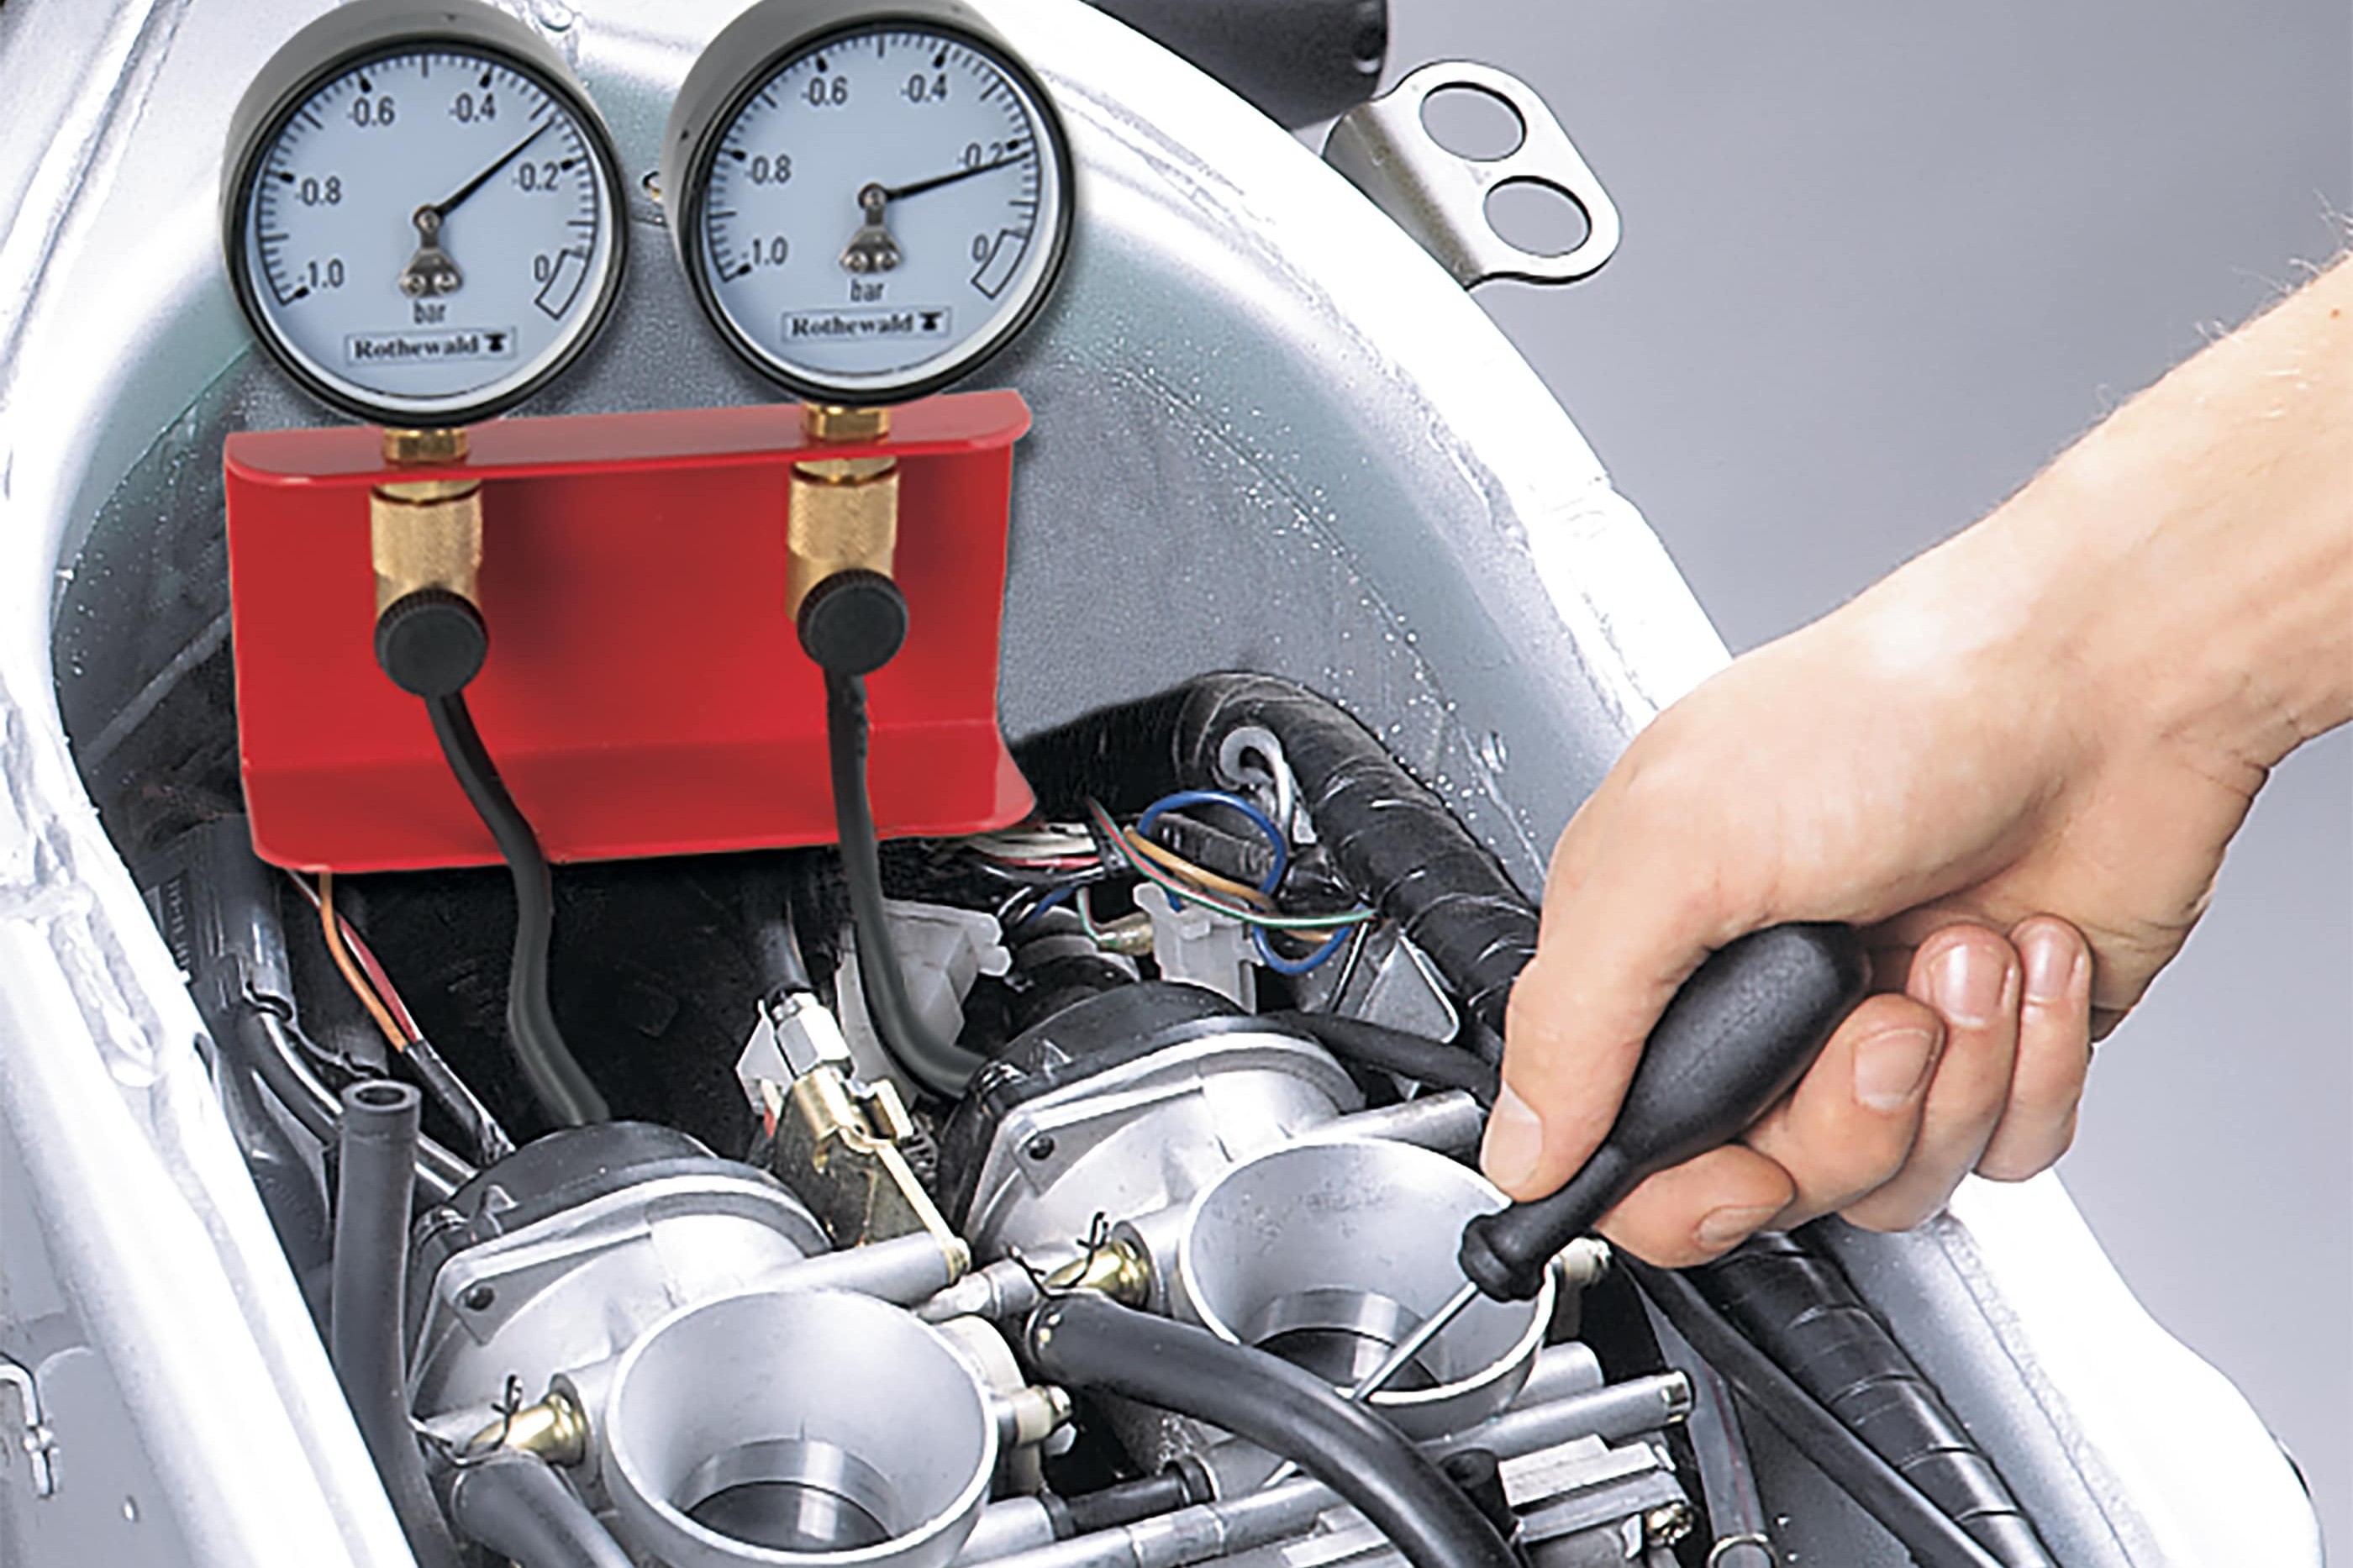
At this point we should remind you once again that synchronisation is not essential as part of normal cleaning, as long as the carburettors are not separated, but it is recommended. A repair manual is essential to find the right connections and adjustment screws. As the word "synchronisation" suggests, the aim is to ensure that all the carburettors supply their respective cylinders with the required air/fuel mixture to ensure smooth engine running.
For this you need a synchroniser that measures the intake vacuum of the individual cylinders. The tester consists of two or four vacuum gauges, depending on how many carburettors your motorbike has. Various adapters are included, which allow the tubes of the vacuum gauges to be connected at the points provided on the engine. Ideally, the intake rubbers will have a connection point, in which case the rubber plugs are simply taken out and the tubes connected up.
Since the tank generally has to be removed to access the synchronisation screws, an external fuel supply is almost always necessary. Adjustment is done with the engine warmed up and running. Be sure you are adjusting the right screws. And after each turn of the adjustment screws, give the throttle grip a quick twist and then check again. Please refer to the repair manual for the permitted deviations in the individual values displayed by the synchroniser. You will also find useful information in the DIY tip Carburettor synchronisation.
Finally, we would like to point out that after installing a Dynojet carburettor kit, it is extremely important to check the appearance of the spark plugs, as an incorrect air-fuel ratio can cause engine damage and affect your safety on the road. The appearance of the spark plugs should be checked after a test-ride on the motorway or after riding a reasonable distance at full throttle. Other tuning work may then need to be done. If you have insufficient experience and want to play safe, you should have these adjustments done by a specialist workshop with a dynamometer.
Our recommendation
The Louis Technical Centre
If you have a technical question about your motorbike, please contact our Technical Centre, where they have endless experience, reference books and contacts.
Please note!
These tips for DIY mechanics contain general recommendations that may not apply to all vehicles or all individual components. As local conditions may vary considerably, we are unable to guarantee the correctness of information in these tips for DIY mechanics.
Thank you for your understanding.
